Showing posts with label Chicken. Show all posts

Saturday, June 30, 2012

Sriracha Chicken Wings


Chicken wings, chicken wings, chicken wings, so many ways to cook and almost all are good.  Most chicken wings found in restaurants are deep fried and coated with hot sauce.  As the story goes the original chicken wing was concocted at the Anchor Bar in Buffalo New York, hence the name Buffalo Chicken Wing, clever.  

Since I rarely, if ever, deep fry anything I make my chicken wings in the oven in the winter and on the grill in the summer.  My personal favorite is the grill so anytime I see grilled chicken wings pop up on one of the barbecue blogs I follow I usually take note.  That was the case a few weeks ago when I came across a blog post with grilled chicken wings using sriracha chili sauce.  Since I happen to have the sriracha chili sauce in the frig, from a family recipe a few weeks ago, it just seemed like one of those moments when everything comes together and the subconscious says to me "Make these wings, make these wings."  Since I can't find the original blog post you will have to follow along to find out how to make these sweet, spicy, delicious wings.  I have changed the recipe from the original because I either 1) Didn't have the ingredients from the original recipe and need to substitute what I did have or 2) I needed to use up the ingredients I did have before I threw them out.  Either way, the results speak for themselves.  

Usually, I sprinkle a little seasoning on the wings and slap them on a hot grill but these wings need to be marinated.  The cast of characters for this episode include (in no particular order):
3-4 pounds chicken wings
1 cup chicken broth
1/2 cup sriracha chili sauce
1/4 cup brown sugar
1/2 medium sized onion, chopped
2 tbsp garlic, minced
Salt
Pepper
Cajun seasoning (I use Emeril's Essence)

All ingredients get mixed together, other than the chicken wings and cajun seasoning, and set to the side.  Next, time to get the chicken wings ready.  I always start by cutting the wing tip off and discarding.  After that, sometimes I'll cut the wing apart at the next joint but this time I decided to leave the wing whole.  Next, sprinkle the chicken with the cajun seasoning, put in a resealable plastic bag, and pour the marinade over the wings.  Put the wings in the frig and walk away, just walk away, for at least 2 hours and preferably overnight.

I let the chicken wings marinate overnight and what a night it was.  Thunderstorms rolled through with winds up to 80 MPH and left 1.5 million people without electricity.  We were lucky and got our electricity back early this morning and the second most important utility, the internet, back in the middle of the afternoon.

Now is the time to fire up the grill, don't need electricity for that, and get it ready to cook wings.  The original recipe said to cook the wings in the marinating liquid for 45 minutes uncovered and then 45 minutes covered.  Then, after that, grill over the hot coals, or flame if you use gas, while basting with the liquid.  The first time I cooked wings using this recipe I did all that and the results were good but since I like to keep my chicken wings simple this time I cooked them over the hot coals until the skin was crispy and then finished them over indirect heat.  However you choose to cook your wings they will turn out good either way.

Regardless how you decide to cook your wings, while the wings are cooking, it's time to make the chicken wing sauce.  The classic sauce, and I think the original, is made up of Frank's Red Hot and butter.  No doubt a good chicken wing sauce but when I saw this particular recipe with sriracha sauce (and if you remember I also had a bottle in the frig) I knew I needed to try it.  The original recipe is as follows:
1/2 cup butter
1/2 cup of sriracha chili sauce
1/2 cup clover honey

Mix ingredients together.
Once again, since I didn't have any clover honey, although I did have regular honey, I decided to use barley malt instead, again left over from a previous recipe.
The barley malt definitely brings a different flavor to the party and one which I like.  I should also mention I only use half the butter the original recipe calls for and only because I really don't need all that butter.


After the wings are cooked it's time to pour the wing sauce over them and serve.
There's some good grub right there, a little spicy, a little sweet, a lot messy, and another way to enjoy those tasty chicken wings.


Tuesday, June 12, 2012

Barbecue Chicken Pizza Part Deux


If you read the last post you will know I made some barbecue chicken.  If you didn't read the last post go ahead and it now, don't worry I'll wait.......................................................Done? Okay let's roll.


For those people that know me you know there is only three in our household and most days or nights there are only two of us for dinner so you may be wondering "Why did he cook 2 chickens when there are only three people to feed?"

Well, the answer is simple, especially if you opened your eyes and saw the first photo, Barbecue Chicken Pizza.  If you have never tried a Barbecue Chicken Pizza it's definitely a must try.  I have made BBQ Chicken Pizza before using different ingredients and different ways of cooking.  Until recently, I have had limited success with pizza on the grill but I think I got it down now.  I have been fairly successful with thin crust pizza on the grill, in my opinion much easier to make than the traditional style, but I prefer the traditional style crust.  I was going to post the recipe for the pizza dough but I think I will save that for a post all by itself.  I will tell you this though, it is the best pizza crust I have found to date and this particular pizza crust was 50% white flour and 50% wheat flour.

As far as the ingredients go for the pizza itself it's fairly short list.  The cast of characters include: leftover bbq pizza from the Sunday cookout, red pepper, sweet onion, barbecue sauce, and some green onion because it was in the vegetable drawer and needed to be used.  Ingredients can vary and the only reason I used these particular ingredients is because I had them on hand.  Cheese can vary too with my normal favorite for bbq chicken pizza being asiago but since I used what I had in the frig I used baby swiss with a little pecorino and parmesean shredded on top.  If you notice the cheese didn't make the photo shoot because it's either A) To shy to show up and have its picture taken or B) The photographer forgot it, take your pick.

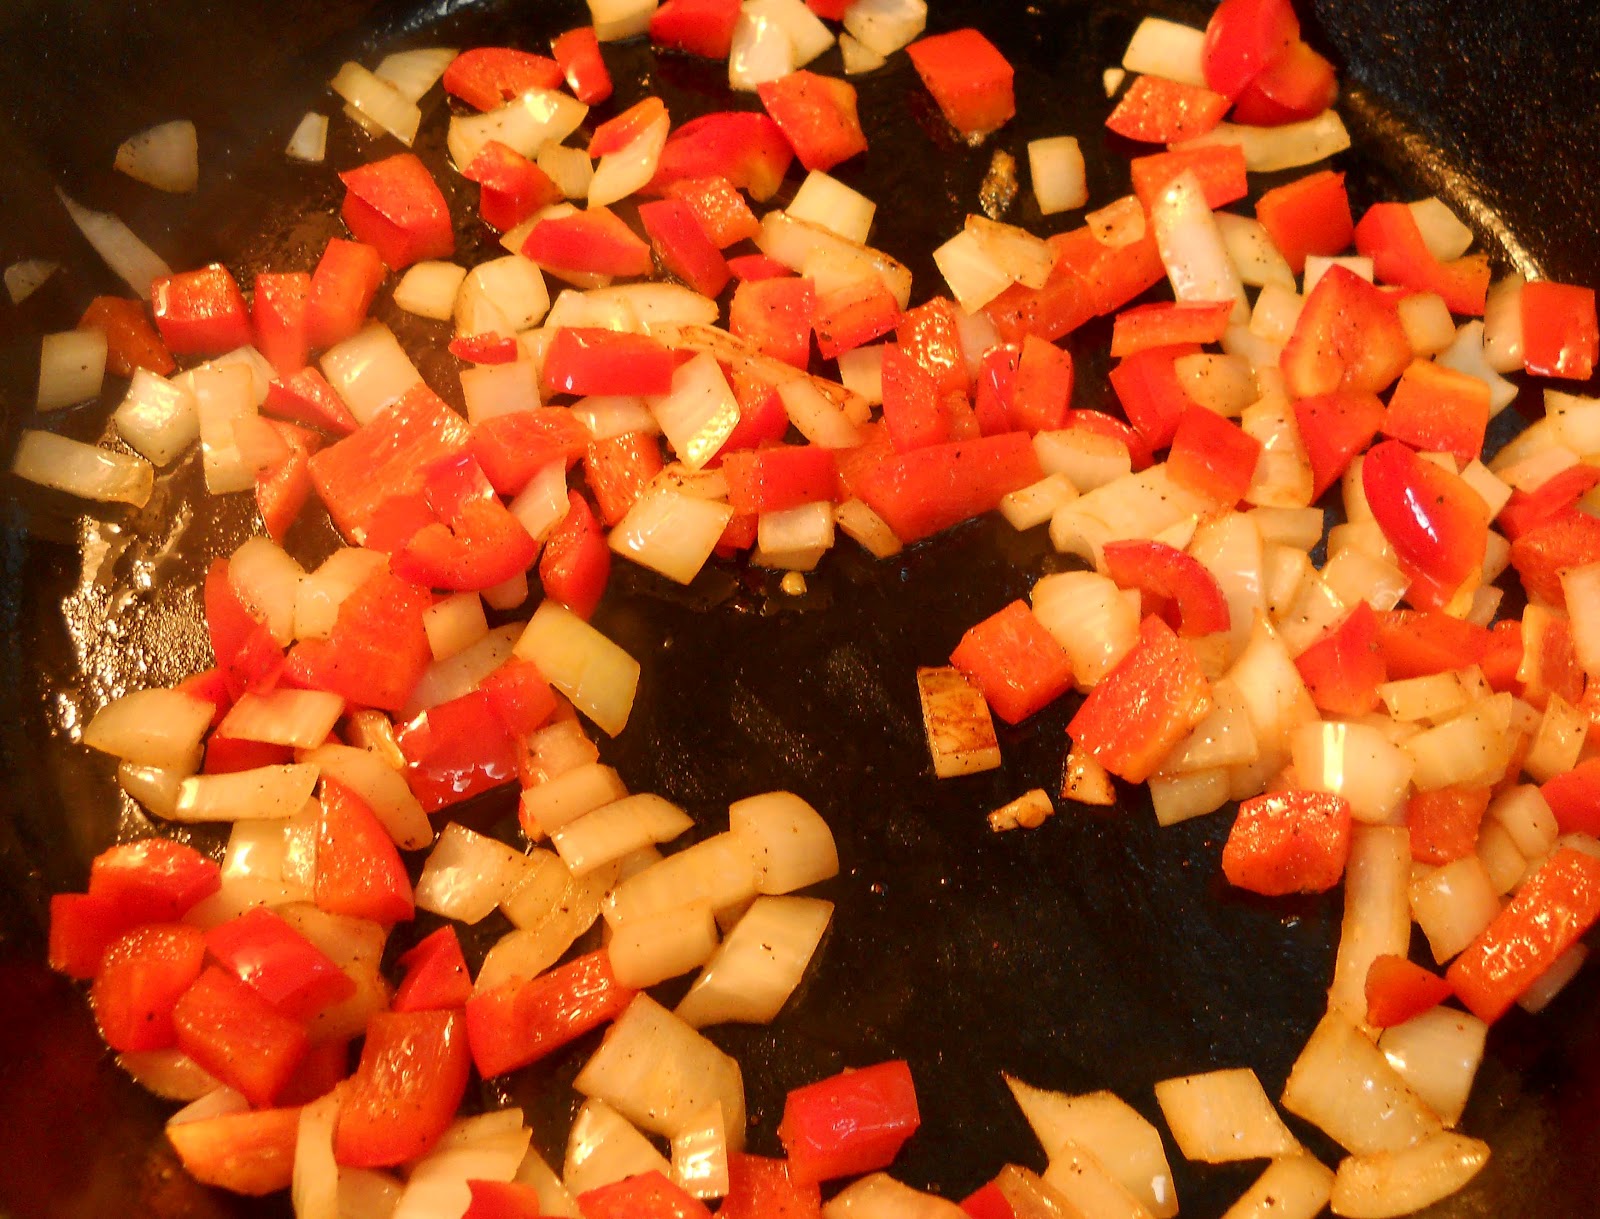
I like to saute the onions and red pepper on the stove top for a few minutes before putting them on the pizza.  I also throw a little fresh garlic in the pan at the end until fragrant.   

Building the pizza is easier than building a box out of Lego's, pizza dough, favorite barbecue sauce, cheese, red peppers and onions, chicken and more shredded cheese on top.  And oh yeah, don't forget the green onions I needed to use up from the veggie compartment in the frig.  Also, notice the pizza peel under the pizza, I was told you can't be a pizza pie maker if you don't have a pizza peel.  I'm not sure the pizza peel makes me any more of an expert but I'm sure it gets me a step closer.

I've tried all sorts of ways to cook pizza on the grill and here is the way the works the best for me.  I start with a chimney full of charcoal and after the coals are white I for a circle all around the outside of the grill.  I also put four or so hot coals in the middle of the grill so when the pizza stone is laid on the grill it helps to warm it up.  And speaking about warming up the pizza stone, that may be the most important step, making sure plenty of time is given to warm up the stone, at least 10 minutes or more.  I'll bet you noticed how much the grill and stone have been used.  Since I don't have a big budget for buying new grilling equipment for every show like the big boys on Food Network I must work with what I got.

Now that the grill and stone are ready all that's left to do is cook the pizza.
That looks good and we're just getting started.  After 12 to 15 minutes, depending how hot the grill gets, we can take a peek and see how things are going........ 
 Ohh, almost ready, only a couple more minutes.
 My, my, my, that looks good.  All that's left to do is let cool, slice, eat and enjoy.


Sunday, June 10, 2012

Grandma's Barbecue Chicken


Let's climb into the wayback machine and take a trip back 40 years or so to my Grandma Williams cottage.  We land on a fall Sunday afternoon, leaves need to be raked and life jackets put away for the winter.  After the leaves are raked in piles and lit on fire we head for the dock on the lake and catch a few bluegills with kernels of corn.  Meanwhile, grandma drags the old red reliable charcoal grill (I'm not sure gas grills existed in those days), piles up the charcoal in a neat pyramid and douses the charcoal with lighter fluid.  After the lighter fluid soaks into the charcoal she touches a match to the coals and fire slowly spreads from coal to coal until the coals were completely covered with white ash.


While the charcoal is getting ready we know within the next couple of hours we will be treated to barbecue chicken by the unmistakable smell of lighter fluid and charcoal burning.  (Years later, in one of my first attempts to use a charcoal grill, I thought the only way to light charcoal was with lighter fluid.  Of course, being a young buck and impatient, thinking if a little lighter fluid is good then more must be better.  Needless to say those burgers tasted just like lighter fluid and that day I swore off charcoal and shortly thereafter purchased my first gas grill.  A few years later, while in a local store, I came across a chimney starter for lighting charcoal without lighter fluid that would change my grilling life forever.)

I don't now what grandma did to get the chicken ready for the grill, I was too busy being a 13 year old boy to care how barbecue chicken was made.  However, I do know she made the best barbecue chicken on this planet.  My guess is she kept it simple, probably salt and pepper, before she tied it to the rotisserie.  There was no mistaking when the chicken finally made it to the grill.  The constant whining of the rotisserie motor told you chicken was cooking.  The chicken was never balanced properly on the rotisserie and the motor changed to a lower growl when the breast portion of the chicken was lifted upwards.  Once the chicken breast cleared the top the motor pitch increased as gravity helped push the rotisserie motor down.  This continued for a 1-1/2 to 2 hours until the chicken was done.  She would start slathering barbecue sauce on half way through and continue until the chicken was done. The smell was incredible and one of my favorites while growing up. Anyway, back to our trip.......

The chicken is fall off the bone good.  Caramelized barbecue sauce on the skin from the thigh is my favorite part of the chicken with the legs coming in a close second.  Oh so good but it's time to get back in the wayback machine and come back to the present.

A couple of years ago I made barbecue chicken for little sister and asked her if it was as good as grandma made back in the day, much to my disappointment she said no.  Needless to say, I expected that answer and that started my quest towards duplicating grandma's barbecue chicken.  I've made barbecue chicken many different ways, and all are good, but I always knew until I bought a rotisserie I couldn't match grandma.  So a couple of weeks ago I broke down and bought a rotisserie for my Weber grill and it turns out to be one of the better gadgets purchased in the last couple of years.  

I knew simpler was better but I a big believer in brine for anything poultry. I usually keep it simple, apple juice, brown sugar or sugar in the raw, salt, and peppercorns.  I heat it all up on the stove top until the salt and sugar are dissolved and cool it all down with a couple handfuls of ice.  The chicken is submerged in the brine overnight.  The next day I remove the chicken and pat it dry with paper towels.  Once dry, I message canola oil onto the chicken and liberally salt and pepper the outside as well as inside the cavity.  Other seasonings can be added but like I stated earlier, simpler is sometimes better.  

Once the chicken is seasoned it's time to put it on the rotisserie and tie it down so it can't flop all over the place.  On to the grill it goes and spins........
.............and spins..........
 ........and spins.......
 ......and spins for 1-1/2 hours until the chicken is cooked through and the barbecue sauce is caramelized and delicious.
 Is it as good as grandma's?  I won't know until little sister gets a taste but I like to think it is.

Sunday, August 1, 2010

Orange Honey Glazed Chicken

I have  been waiting and waiting for big sis to post this recipe for about a year now but I guess she is too busy posting graduations, planning weddings, traveling to New York City and who knows where else to post food blogs.  Not that those things aren't important but come on, we are talking about food here, the basic ingredient to life.

She introduced me to this recipe a year ago after bragging about how it was her favorite chicken recipe for
 months prior.  I got to admit it's pretty darn good and well worth a post on this blog.
There are a couple of differences from the recipe posted below.  The first being I used thighs instead of breast (a change big sis made and I continued with it) and the second is I used orange juice instead of tangerine juice because I can't find tangerine juice. 

Let's take a look at this weeks cast of characters........
First things first and we must make the glaze.  It's an easy glaze to make just combine the thyme and orange juice in a sauce pan and cook down.  Remember to leave enough time to reduce the orange juice because it took me 45 minutes or so to get the orange juice reduced to what the recipe calls for. 
Now that the hard part is done it is time to FIRE UP THE GRILL!!!!!!
It really is pretty simple from here, start by cooking the thighs, brush on some glaze and take off the thighs before they are over cooked.  If you do that and follow the directions below here is what you end up with.
A delicious chicken recipe that is so simple to make it can be cooked for a weekday dinner.  My for rating for this recipe is 4.25 forks out of 5.  The only reason it is 4.25 is I think the recipe has too much cumin (personnel preference).  The next time I will cut the cumin in half and the rating will be higher, I have no doubt about that.

So in the end it looks like big sis really did have a good chicken recipe, even if she didn't get around to sharing it with everyone, and one well worth keeping around in the recipe box.


Bobby Flay’s Winner of a Chicken Dinner
Chicken With Tangerine-Honey Glaze

3 cups tangerine juice or tangerine-orange juice (not from concentrate)
5 fresh thyme sprigs
1/4 cup clover honey
Kosher salt and black pepper
3 Tbsp Spanish paprika
1 Tbsp ground cumin
1 Tbsp dry mustard powder
2 tsp ground fennel seeds
2 Tbsp canola oil
4 boneless, skinless chicken breasts (about 8 oz. each)
2 green onions, thinly sliced, for garnish

1. Combine the juice and thyme in a medium saucepan and bring to a boil over high heat. Cook, stirring occasionally, until thickened and reduced to about 1/2 cup; remove the thyme stems and discard. Whisk in the honey until incorporated and season with 1/2 teaspoon of salt and 1/4 teaspoon of pepper. Transfer to a bowl and let cool to room temperature.

2. Heat grill to medium-high.

3. Stir together the paprika, cumin, mustard powder, fennel, and 1 teaspoon each of the kosher salt and black pepper in a small bowl. Brush both sides of the chicken with the oil, and season with salt and pepper. Rub the top of each breast with some of the spice rub and place on the grill rub-side-down. Cook, without touching, until they’re lightly golden brown and a crust has formed, 3 to 4 minutes. Turn the breasts over, brush the tops liberally with some of the glaze, flip them, and continue cooking until an instant-read thermometer inserted into the center registers 155°F. Remove from the grill, brush the spice-rub side with more of the glaze, tent loosely with foil, and let rest 5 minutes before serving.

Serves 4. Per serving: 460 calories, 39g carbs, 48g protein, 12g fat, and 125mg cholesterol.

http://www.parade.com/export/sites/default/food/recipes/parade/090719-bobby-flay-chicken-dinner.html

Thursday, November 19, 2009

Grilled Chicken, Roasted Red Pepper and Spinach Pizza


Over the last few years I have come to realize how lucky or spoiled I was durning my high school years and young adult years.  Back in those days we use to cruise the small town of Clare and by the end of the night it would usually end at the local pizza shop, B & J's and later the Corner Store.  Both had great pizza with the Corner Store pizza having my most favorite crust.  Rumor had it their secret ingredient was sugar, I don't know what it was but it sure was good.  Since my earlier adult years I have had several pizzas for many different places and there is only one place I would rate close to these two eateries. Believe it or not it comes from the little ole town of Plymouth, Wisconsin at a place called De O'Malleys. 

De O'Malleys had good pizza with the crust just the way I like it, traditional style or soft, chewy type.  I'm not a fan of the thin, crispy type of crust and that is what you typically find here in Rockville Maryland.  Oh sure I can find traditional style crust but the pizza is something I wouldn't write home about.  For me I like a little more crust under my pizza toppings and I like the edge of the crust to rise up like bread when it cooks.  I like that golden chunk of cooked pizza dough around the outside a good pizza it reminds me of fresh bread that just came out of the oven.

I know a pizza can't be good without good toppings but the foundation of the pizza begins with the dough.  I have been trying for years to make a good pizza dough without much success until lately.  Recently I came across Emeril's pizza dough from the Food Network web site.  It is a simple recipe with ingredients found in the normal persons kitchen.  I made the dough a few weeks ago and I though it was alright but it was missing something to be that outstanding pizza dough.  I started to do some experimenting and here is what I have come up with so far, a blend of 50% all purpose flour and 50% whole wheat flour.  I'll bet you are wondering how whole wheat flour can be part of a great pizza dough?  I'll be honest the pizza dough is better without the whole flour but I am trying to eat healthier these days and if I want to eat pizza this is my compromise. 

The other change I made from Emeril's dough is I use honey instead of sugar for a sweetener.  I also put a little fresh garlic in the dough this last time I made pizza.  What I came up with was a tasty little crust with a hint of garlic.  I think the honey goes well with the whole wheat theme too and when honey is involved that's never a bad thing.

If you notice in the photo to the right I also cook my pizzas in a cast iron skillet.  Why?  Well, as big sis found out in her Rosemary Dinner Rolls when bread dough is teamed up with heavy cast iron the bread, rolls or in this case the pizza crust comes out golden brown and delicious.  For me the cast iron makes it almost fool proof unless you totally neglect the call of your kitchen timer or the obnoxious screaming of your smoke detector. 

From here on out it's all downhill with the toppings you can choose almost anything you like.  No more are pepperoni, ham, mushrooms or mozzarella cheese must use toppings.  Pizzas come in many, many different varieties these days and lately my choice for toppings have been grilled chicken and roasted red peppers.  I have been experimenting with different cheeses lately with my favorite so far being asiago.  But for this particular pizza I found some fontal cheese at Whole Foods Market this week.  It is similar to mozzarella with a little more distinct flavor than mozzarella.  This pizza also included a handful of spinach (since I didn't have any fresh basil and the spinach was sitting in the ice box begging to be used) and I topped it all off with a little grated parmesan reggiano cheese. 

Overall a pretty good effort on the pizza front for me I think I am making progress.


Jock's Grilled Chicken Pizza
Ingredients
1 cup warm water, about 110 degrees F
1 packet dry yeast
2 tablespoon honey
2 tablespoons olive oil
1 1/2 cups general purpose flour
1 cups whole wheat flour
1/2 teaspoon salt
2 cloves garlic, minced fine
4 boneless skinless chicken thighs
Emeril's Essence
1 small jar roasted red peppers
1 cup pizza sauce
8 oz. asiago cheese. sliced
1 cup fresh spinach
½ cup Parmesan cheese

Directions

To the bowl of an electric mixer fitted with a dough hook, add the warm water and yeast and honey and stir to dissolve the yeast. Add the olive oil, flour, garlic, and salt. Mix with the dough hook until the dough comes together and climbs up the dough hook. Remove the dough from the mixer and, on a floured surface, form into a smooth ball shape. Place the dough into a greased bowl and cover with a clean towel. Place in a warm, draft free place for 45 minutes to 1 hour, or until the dough doubles in size.

Preheat oven to 425 degrees

Meanwhile sprinkle chicken thighs with Emeril's Essence liberally.  Place chicken in oven and cook for approximately 30 minutes.  Or better yet cook outside on grill for 30 minutes.  Let chicken cool and slice.
Heat oven to 450 degrees.

Turn the dough out onto a floured surface and roll to desired size. Spray or brush 12” cast iron skillet with olive oil. Place dough in cast iron skillet and let drape over the edges. Cut dough around top of skillet and fold down along edge to form an edge for the pizza. Spread pizza sauce over dough, layer cheese, add roasted red peppers, chicken and spinach. Top with Parmesan cheese.

Place pizza in oven and cook for approximately 15 minutes or until edges are golden brown. Let cool for 5 minutes and slice.

Saturday, November 7, 2009

Jock's Cranberry Glazed Chicken

Cranberry Glazed Chicken

This last week I made some cranberry glazed chicken for dinner and decided it looked so good I would post a picture on Facebook. Little did I know the Porcupine Press folks were watching and asked me for the recipe so they can put it in their Just Shut UP and Eat It section. I guess you can say this post is for the Porcupine Press people. Now I got something to look forward to every month when my UP Magazine arrives.

I will admit even though the recipe below calls for the chicken to be cooked on the grill I cooked this particular glazed chicken inside on my cast iron grill over the stove top. The recipe works well cooked both ways but it is hard to beat if you can cook it over real charcoal.

Another note to make is regarding Emeril's Essence, you can purchase it in the grocery store or make it yourself by going to the Food Network web site and getting the recipe. I make my own so I can control the amount of salt that goes into it. The other choice is to use whatever seasoning you like I just prefer Emeril's Essence.

Jock's Cranberry Glazed Chicken
(Click here if you want your own copy of this recipe.)

1 (12-ounce) bag fresh cranberries
1/3 cup chopped ginger
2 teaspoons orange zest
1 cup sugar
1/2 cup orange juice
1 cup water
6 Chicken thighs
Canola oil
3 Tbs Emeril's Essence Seasoning
1 Cup Hickory Chips

Glaze:
Combine the cranberries, ginger, orange zest, sugar, orange juice, and water in a saucepan. Bring to a boil over high heat, stirring occasionally, and reduce to a simmer. Cook for 45 minutes, or until cranberries burst and sauce is very thick. Strain through a fine mesh sieve. Use right away or store in the refrigerator for up to one (1) week. Reserve some cranberry glaze for the table.

Chicken:
Fire up the charcoal grill and once coals are ready arrange on ½ of the grill. Sprinkle the hickory chips on the hot coals and cover until smoke starts to develop.
Meanwhile remove chicken from refrigerator and pat dry. Coat lightly with canola oil and sprinkle liberally with Emeril's Essence. When the grill is ready place the chicken skin side down over the hot coals, with lid on, until browned, about 2 minutes. Turn over and repeat. After chicken is browned on both sides move over to the cooler side of the grill skin side up and glaze with cranberry glaze from above. Place lid back on grill and cook at 350 degrees for approximately 40 minutes or until meat thermometer reads 170 degrees. With about 10 minutes left turn chicken over and glaze bottom side. With 5 minutes left turn chicken back over to skin side up and glaze one more time.

Serve with reserved cranberry glaze drizzled over top at the dinner table.

Sunday, November 1, 2009

Chicken and Noodles

As promised here is the premiere episode of Wednesday Night Leftovers. The great thing about the internet is you will never know what night I actually eat leftovers because it doesn't come at you live. I can tell you this though, we do normally eat leftovers on Wednesday and sometimes Thursday night. Since I need a title for this series I chose Wednesday night because it sits right in the middle of the week.

Time to roll.......

Remember this little diddy from last weeks Sunday Dinner Episode? Chicken Pot Pie and as normal we have leftovers.

It is hard to completely change a meal from leftovers but there are little things that can be done to at least give a different type of meal than making it seem like you are eating the same old thing from Sunday. A good leftover meal shouldn't take much effort to prepare especially during the week when the last thing you feel like doing is cooking.

Enter tonights stars, leftover chicken mixture from Sunday and egg noddles. Notice the whole wheat noodles. We only use whole wheat pasta and noodles now because they have improved it so much from a couple of years ago and we don't even notice the difference anymore.

The toughest part of the tonights dinner has just been completed, getting the everything out on the counter, from here it's all downhill.

The only thing that could make tonights meal easier is if it could be cooked all in one pan. Since the noodles need to be boiled in some salted water we must use a second pan. My choice is my trusted double boiler that I use for all my pasta cooking.

At the same time the chicken leftovers go in a pan and warmed up, this is so easy even a caveman can do it.

By now you probably realize where I am going with this so we can spare all the suspense and show the final scene.
Photobucket
Looks good, eh? And mere minutes to prepare. On a leftover scale I give it a 4 out of five forks. I can't give it 5 because some leftovers seem to gain flavor as they sit in the refrigerator but this really didn't.

Still pretty good and even better, so easy to prepare.

Monday, October 26, 2009

Chicken Pot Pie

It probably started 6 maybe 7 years ago with the wife telling me she wanted chicken pot pie. I said "No! I can't stand that that crap." Of course I was talking about the frozen variety you buy out of the store. You know the the kind I'm talking about, the crust resembles anything but a real crust and tastes closer to dried cardboard than good crust. I couldn't help but think about frozen pot pies everytime she brought the subject up. Imagine her surprise this week when she asked what was for Sunday dinner and I answered Chicken Pot Pie.

"But you don't like chicken pot pie" she exclaimed.

"Well I don't like the frozen ones and I don't think I have ever had a real homemade one before so I am willing to try. Besides I am making it more for you because you have been bugging me about making it for a few years now." At least that was my angle I was taking for an excuse to give chicken pot pie a try.

My thought as I was trying to find a good recipe to try was let's go to a master at comfort food cooking. I know there are a couple of good cooks on Food Network that make good comfort food but after looking at recipes I chose Ina Garten's recipe, besides Ina is one of those cooks that makes everything look better when she gets done.

It's time to roll and here is this weeks cast of characters.....

Photobucket

A fine looking cast this week.

First we must roast the chicken breast so we spray them with a little olive oil and cover them with salt and pepper. Don't be afraid to be generous here because you will be throwing the chicken skin out anyway.

Photobucket

Let's take a look at the chicken after an hour of roasting in the oven.

Photobucket

At this point I am thinking "Who needs chicken pot pie when I can eat the chicken breast straight from the oven." As tempting as that may be I need to stay on point and make the chicken pot pie.

Next we need a cooking vessel or vessels. A quick trip to Bed, Bath and Beyond, well not a quick trip since the first Bed, Bath and Beyond didn't have any. The nice clerk in the store looked up on the computer to see if they had any ramicans and they didn't but she checked the other stores in the area and found some in Gaithersburg, only about 10 miles from home. One of the great things about living here is we have three Bed, Bath and Beyonds' within 10 miles of our place and that's no exaggeration.

Photobucket

I thought I would throw in a black and white photo, I don't get a chance to do that very often.

This is the part of the show where I cheat a little bit, instead of making my own pastry (just in case any of you don't know I don't bake) I used store bought. In the original recipe below Ina makes her own pastry and if you really want to go ahead, like I said the recipe is down below.

Photobucket

Another character that deserves a photo all its own is the frozen pearl onions. When I was reading reviews many of the reviewers omitted the little frozen wonders and all I could ask was "Why?" These little pearls are one of my favorite items for comfort food. Next time you make beef stew add these to the pot and you will be hooked, I promise.

Photobucket

Let's get back to why we are all here today, chicken pot pie.

Chunk up the chicken.......

Photobucket

.........make a roux, after all this is the base for our pot pie.......

Photobucket

......add the remaining cast of characters.

Photobucket

That went fairly quick, next top with puff pastry. Start by folding the pastry out of the cutting board........

Photobucket

.......and find something to cut a nice round circle about an inch larger than the ramican. In this case a cereal bowl worked just fine.

Photobucket

Fill the ramicans up with delicious chicken pot pie and top with puff pastry.

Photobucket

A little egg wash, salt and pepper and we are ready for the oven.

Photobucket

Cook until golden, brown and delicious or as Alton Brown would say GBD.

Photobucket

Time to open one up and see what we got...........

Photobucket

.....and a little bit more............

Photobucket

I'll confess not bad, not bad at all. These were nothing like their distant cousins from the frozen food section of the grocery store. The tops were nice a flaky and the and inside had plenty of chicken flavor and good vegetables including those sweet little pearl onions we talked about earlier. I will give it a 4 out of 5 forks because after all it is still chicken pot pie.

The good news is there was leftovers so starting this week will be the series premiere of Wednesday Night Leftovers.

Stay tuned.

Chicken Pot Pie
2005, Ina Garten, All Rights Reserved

Serves: 4 individual pot pies
Ingredients
3 whole (6 split) chicken breasts, bone-in, skin-on
3 tablespoons olive oil
Kosher salt
Freshly ground black pepper
5 cups chicken stock, preferably homemade
2 chicken bouillon cubes
12 tablespoons (1 1/2 sticks) unsalted butter
2 cups yellow onions, chopped (2 onions)
3/4 cup all-purpose flour
1/4 cup heavy cream
2 cups medium-diced carrots, blanched or 2 minutes
1 (10-ounce) package frozen peas (2 cups)
1 1/2 cups frozen small whole onions
1/2 cup minced fresh parsley leaves

For the pastry:
3 cups all-purpose flour
1 1/2 teaspoons kosher salt
1 teaspoon baking powder
1/2 cup vegetable shortening
1/4 pound cold unsalted butter, diced
1/2 to 2/3 cup ice water
1 egg beaten with 1 tablespoon water, for egg wash
Flaked sea salt and cracked black pepper

Directions
Preheat the oven to 350 degrees F.

Place the chicken breasts on a baking sheet and rub them with olive oil. Sprinkle generously with salt and pepper. Roast for 35 to 40 minutes, or until cooked through. Set aside until cool enough to handle, then remove the meat from the bones and discard the skin. Cut the chicken into large dice. You will have 4 to 6 cups of cubed chicken.

In a small saucepan, heat the chicken stock and dissolve the bouillon cubes in the stock. In a large pot or Dutch oven, melt the butter and sauté the onions over medium-low heat for 10 to 15 minutes, until translucent. Add the flour and cook over low heat, stirring constantly, for 2 minutes. Add the hot chicken stock to the sauce. Simmer over low heat for 1 more minute, stirring, until thick. Add 2 teaspoons salt, 1/2 teaspoon pepper, and heavy cream. Add the cubed chicken, carrots, peas, onions and parsley. Mix well.

For the pastry, mix the flour, salt, and baking powder in the bowl of a food processor fitted with a metal blade. Add the shortening and butter and mix quickly with your fingers until each piece is coated with flour. Pulse 10 times, or until the fat is the size of peas. With the motor running, add the ice water; process only enough to moisten the dough and have it just come together. Dump the dough out onto a floured board and knead quickly into a ball. Wrap the dough in plastic and allow it to rest in the refrigerator for 30 minutes.

Preheat the oven to 375 degrees F.

Divide the filling equally among 4 ovenproof bowls. Divide the dough into quarters and roll each piece into an 8-inch circle. Brush the outside edges of each bowl with the egg wash, then place the dough on top. Trim the circle to 1/2-inch larger than the top of the bowl. Crimp the dough to fold over the side, pressing it to make it stick. Brush the dough with egg wash and make 3 slits in the top. Sprinkle with sea salt and cracked pepper. Place on a baking sheet and bake for 1 hour, or until the top is golden brown and the filling is bubbling hot.

Printed from FoodNetwork.com on Thu Oct 2, 2009
© 2009 Scripps Networks, LLC.
All Rights Reserved