Showing posts with label Beef. Show all posts

Sunday, August 12, 2012

Prime Rib and Did that Chunk of Meat Just Talk to Me?

I've been gone for a couple of weeks due to a trip back to Michigan and after we got back I didn't feel like cooking until the weekend rolled around.  Once the weekend rolled around the big question was "What to cook?"  This morning, during breakfast and my weekly two eggs over easy and toast, I pulled out one of my Weber cookbooks and started scouring through recipes trying to develop ideas.  The pork wasn't tripping my trigger and the wife doesn't like lamb so I turned to the beef section.  Beef, yeah sounds good to me and it's been awhile since we had any beef.  After looking through the recipes I settled on a beef tenderloin recipe, it sure looks good, time to head for the store.  

The first store I went too I wasn't happy with the beef selection at all so it's off to the next store.  Once I get to the next store I head to the back where the meat case is located.  I always go past the display case where the in store butcher is behind the counter to check out the steaks.  This particular store always has a good looking meat display and sometimes they have good sales, this week was no exception.  The prime rib roast was on sale this week and it was talking to me.  (The great thing about the prime rib roast, even though it can be pricey to purchase, is I can get 3 different meals out of one roast, prime rib (obviously), Mongolian Beef later in the week and maybe my favorite Philly Cheese Steaks.)  Of course I answered the rib roast and told it "I'll be back if the beef tenderloin thing doesn't work out."   Somehow I knew I would be lured back to that rib roast.

I headed over to the other meat display case, where there isn't a butcher to help, and found the tenderloin.  The tenderloin was talking too but I didn't like what I was hearing.  All they had were large tenderloins and they were anywhere from $80 to $100.  Ah, I don't think so, can't spend that for an afternoon of grilling.  By now, as you may have already guessed, the rib roast is yelling loud an clear, "COME BACK, COME BACK!"  I did go back and bought a 4-1/2 pound rib roast and proceeded to change my afternoon plans.  

When it comes to beef, especially rib roast, I like to keep it simple.  If the meat is good quality the flavor will come out with little coaxing.  This is a big chunk of meat and as soon as I get home I want to season it.    The first thing I do is cover the entire hunk of meat with olive oil to help the seasonings adhere.  Liberally, I sprinkle coarse seas salt, fresh ground pepper and granulated garlic and wrap it will plastic wrap and put it in the frig for a few hours.  
 An hour before loading this big boy on the grill I take it out of the frig so it can come up to room temperature.  During this hour I take the time to get the grill ready.  Normally, I use the smoker to cook a rib roast but since I bought a rotisserie this spring I decided to roast this bad boy.  I got the charcoal going and threw in a couple of chunks of hickory wood for some smokey flavor.
 I let this roast spin for 1-1/2 hours at 400 degrees F until I had an internal temperature of 125 degrees F, a good medium rare for me.  One thing to remember, with any large piece of meat, is it will continue to cook after it is removed from the heat.  I didn't measure the internal temperature after I let the roast rest for 15-20 minutes but I would guess it was someplace in the low 130 degree F. range.  
 
Mmm, good stuff right there.  Crispy exterior loaded with flavor from the seasoning.  Smoky hickory wood flavor but not too strong, just the way I like it.  This roast was loaded with flavor and I can't wait until later in the week when I get to make philly cheese steaks with the leftovers.  

The next time you walk by the meat display case listen closely, you never know what might be talking to you.


Sunday, July 22, 2012

Barbecue Beef Ribs

I went to the store today to buy a boston butt, or a front pork shoulder roast for those of you that don't know barbecue jargon.  Now, if you are looking at the photo to the left you are probably saying to yourself "That don't look like no pork roast."  Well, good eye and maybe you should consider your next career as a butcher.  What happened was I didn't like what I saw for pork roast but I did like the beef ribs located above the roast.  Since it can be hard to find beef ribs in this area, and the pork roast wasn't the greatest, I changed direction and decided to go with the beef ribs.  Maybe next weekend I'll make some barbecue pork sandwiches.
Since I have never had a lot of luck with beef ribs, normally end up tough something along the lines of old shoe leather, I turned to my best friend Google to help me out.  I was looking for cooking times to make sure I give the ribs enough time on the smoker since I think this has been my biggest downfall when barbecuing beef ribs.  But one problem, the times I found were anywhere from 1-1/2 to 6 hours at 225 degrees, really not a lot of help there.  After taking into account the thickness and size of the ribs I decided to start at 3 hours and go from there.
The next big decision to be made is what, if any, rub to use.  I decided to go with the Mike Mills' Beef Ribs recipe from the Food Network and his Magic Dust.  It is a quick and easy rub with most, if not all, the ingredients found in the pantry.  The Apple City Barbecue Sauce at the end of the recipe is the inspiration for my own barbecue sauce.  It's the recipe that got me started in the right direction years ago when I wanted to make my own apple barbecue sauce.  While I didn't end up using Mike Mills recipe, this is a very good recipe to try if you like apple flavored barbecue sauce.

On to the smoker to get it ready.  Today I had to clean the ashes out of the bottom which normally needs to be done after using it a couple of times.  I put enough charcoal in to last up to 6 hours, if needed, and decided on hickory chunks of wood to deliver the smoke flavor to the ribs.  I tend to favor hickory for beef and apple and cherry wood for pork and chicken.  Since it is summer and the temperatures are warmer, I chocked the the air vents down to about 1/3 the way open.  Once the charcoal is ready it's time to dump a chimney full of hot charcoal on top and get this smoker started.  All that's left now is to slip the beef ribs on the grates and wait.  And wait.  

I decided at the 3 hour mark to lift the lid to see how the ribs were doing.  Well, well, what do you know, the meat just getting to the point where it was going to fall off the bone, perfect, let's get the sauce.  My choice today?  How about my own apple barbecue sauce, sweet, spicy and full of apple flavor.  

 After mopping on some barbecue sauce I let the ribs finish for another 15 minutes on the smoker before removing them.  After letting them rest another 15 minutes I cut them apart into single bone servings and drizzle some more barbecue sauce on them.  And of course take a picture just because it's what I do. 
 Mmmmm, sweet, spicy, smokey, juicy, messy an full of beef flavor.  Finally, beef ribs I can be proud of and enjoy for this weekend.  Maybe next weekend I'll get to that barbecue pork sandwich.


Saturday, June 16, 2012

The Best Steak I Ever Made

I
I'll admit it, I'm a Food Network junkie.  This time of year, right after Washington Nationals baseball, it's my most watch TV channel.  Every year after Memorial Day Weekend the Food Network airs a week of barbecue and grilling and I set my dvr to record many shows during the week so I can watch them later and to also save shows that have recipes I want to try.  This particular recipe idea for this post came from a show called The Best Thing I Ever Made during the grilling week specials.  For those of you not familiar with the show several chefs from The Food Network will share the best thing they ever made, along with the recipes and how to prepare them, on the show.  Every week the show has a theme and of course during grilling week the theme was.............wait for it.........Grilling!!!

Although there were many good ideas and recipes on that show the one that stood out to me was the Grilled  Ribeye Steak by Chef Geoffrey Zakarian.  In my never ending quest to grill a better steak I immediately filed this recipe away for later.  Chef Zakarian didn't give me any earth shattering information I didn't already know but he did use a little different method than I normally use.  His ingredient list is simple enough, olive oil, salt, pepper and a little pad of butter applied after grilling but it is when he applies all the ingredients, other than the butter, that is different.  My normal method is to get the steak out of the frig before I go out to start the grill and this is when I apply oil, salt and pepper.  If you checked the Grilled Ribeye Steak link above you will notice Chef Zakarian use a ribeye steak 2-1/2 inches thick.  What he said during the program was a thick steak like that needs plenty of salt and pepper and plenty of time to absorb the salt and pepper. He salt and peppered the steak the night before and let it sit in the frig.  The next day he got the steak out a hour before he wanted to grill to give it a chance to come up to room temperature (this also helps to cook the steak more evenly once on the grill).  Since my steaks were only 1-1/2 inches thick I applied the salt and pepper in the morning of the day I planned on cooking them.  

My choice of charcoal for cooking the steaks was the hardwood type charcoal.  I also knew I wanted a hot fire, the hardwood charcoal burns much hotter than the regular charcoal, so I decided to put a pan under my charcoal holders so the grate sat on top of the coals.  I watched Alton Brown on Good Eats cook steak on top of charcoal and it always intrigued me.  I'll admit, I don't think I will ever be able to put meat in direct contact with the charcoal but none the less, I still wanted to try something similar.  After the grill was ready I had one hot fire and it was time to get the steaks.

I made sure I didn't go far while cooking the steaks because I didn't want the steaks to end up as as big chunk of charcoal.  I cooked the steaks 5 minutes on each side, alternating with the lid up and with the lid down.  I only put the lid down whenever I thought the fire was going to flame up but once I was convinced fire wasn't going to engulf the steaks and turn them into blackened shoe leather I left the lid up.  After the steaks had sufficient sear marks on each side I slid them to the "cool" side of the grill and let them finish cooking for another 10 minutes until they were a perfect medium rare.  

Hot off the grill and tempting to pick up by the bone and start eating.  But I can't do that because these steaks need to rest for 15 minutes.  The recipe also calls for a pad of french butter to be added to the steaks while resting.  I'm not sure what "french" butter is or what makes it different but since I had some Lancaster County Pennsylvania Amish butter I used that instead.
Once rested, it was time to slice the steaks and get them ready for their final resting place, my plate.  I got to admit though, after I sliced the meat off the bone I did pick up the bones and chew the remaining meat off.  After chewing on a bone I can see why dogs fight over steak bones.  
The steak was served on a simple salad, leafy greens, red onions, red peppers and sweet grape tomatoes.  This might be the best way to eat a steak.
So simple and yet so delicious.  How did the steak turn out?  It's the best steak I ever made and gets a perfect 5 out of 5 forks.  You would have to search far and wide to find a fancy steak joint that could serve a steak as good on this.

Original Recipe

Grilled Rib Eye Steak with Romaine Marmalade and Watercress

Thursday, December 10, 2009

Mongolian Beef and Shrimp


 I took an extreme right turn for this weeks Sunday Dinner Episode from where we have been for the last month or so.  This week we are taking a shot at chinese cooking.  Chinese food, one of my favorites, for some reason is one the the hardest types of food for me to cook.

 Back in the day when I used to work in Midland Michigan once a week or so we would go to one of the chinese restaurants in town.  Midland was fortunate to have two fine chinese restaurants, one being Pi's and the other China Palace.  It was a toss up for peoples favorite, mine is China Palace.  Whenever I went to the China Palace and didn't eat the buffet I would order either the mongolian shrimp or mongolian beef.  I loved the stuff and it is still my favorite of all chinese food.  Since I have left the Midland area and went to other chinese restaurants in other towns I have found out how hard it is to find mongolian beef or shrimp.  I did find mongolian beef at P.F Changs in Arlington Virginia but I have yet to find mongolian shrimp at any restaurant.

I have tried to duplicate the mongolian beef and shrimp recipe for the last three years with little luck.  It's been a few months since I tried so I thought I would give it another shot.  I searched the internet and finally came up with a recipe that is suppose to be the one P.F Changs use.  I did change it a little because the Mongolian meals I had at the Midland restaurants didn't have mushrooms.   This cast of characters are as follows.........

 Not a big cast this week and I like that. 

I followed the recipe below and I will admit I was a little disappointed when I finished.  The dish was good, it just wasn't what I was hoping for which is something close to the mongolian beef from the China Palace.

Next I thought I might as well try with shrimp and make a couple of changes.  First I decided not to to use the cornstarch and coat the shrimp.  Most recipes I find on Mongolian shrimp or beef use a light dusting of corn starch but I don't remember the mongolian shrimp at the China Palace having any type of coating.  The other change I made was to slice up a half of onion and cook with the shrimp.  I also added more ginger to the shrimp while it cooked but used the same sauce as the mongolian beef.  I should add I threw in a few red pepper flakes to kick it up a notch because after all mongolian shrimp can be a bit spicy at times.  What I ended up with was mongolian shrimp dish that is getting darn close to the China Palace one.  I think the ginger might be the difference.

 At the end of the day my search for the perfect mongolian shrimp or beef continues and maybe someday I'll find what I am looking for but until that day I think I may have found something close that I can use.

Mongolian Beef
  • 1 lb flank or skirt steak, sliced in thin strips
  • 1/4 cup corn starch
  • 2 tsp vegetable or peanut oil
  • 1 tsp fresh ginger, minced
  • 1 tbsp garlic, minced
  • 1/2 cup low sodium soy sauce
  • 1/2 cup water
  • 1/2 cup dark brown sugar
  • 1 cup vegetable or peanut oil
  • 1 bunch green onions, green part only, cut in half
 Dust steak pieces lightly in cornstarch and set aside while preparing the sauce. In a small sauce pan heat oil over medium high heat. Add ginger and garlic. Add soy sauce and water to the ginger and garlic before it browns. Add brown sugar and whisk until dissolved. Bring sauce to a boil and simmer about 10 minutes or until slightly reduced and thickened. Remove from the heat and reserve.

In a wok heat 1 cup oil over medium high heat. Working in batches, add the steak a few at a time to the hot oil. Cook about 1 minute without touching the meat then flip each piece and cook 1 minute more.

Remove meat while still rare inside, and continue with next batch. Once all meat is browned, pour off oil and wipe out skillet.

Add steak to the hot pan and cook about 1 minute. Add sauce to the pan and simmer and toss meat and sauce about 1 minute. Add green onions and heat 1 minute.

Serve over rice.

Tuesday, November 17, 2009

Sauteed Beef Tip with Shiitake Mushrooms


This past weekend as I was cruising through the Food Network web site looking for Sunday Dinner ideas I came across this little ditty.  My first thought was this looks quick and easy and something I could easily do on a weeknight.  Of course it didn't hurt my man Emeril was the author of the original recipe. 

I made some minor changes like substituting yellow onions for the shallots and instead of veal stock I used beef broth, in both cases it is what I had on hand and I wanted to use it up.  I also added the rice, which I cooked in beef broth, to lay the beef tips on.  You could also use noddles if you choose.

Overall I would rate it 4 out of 5 forks.  My only complaint was the cream taste was stronger than I like, I think next time I will use half and half and that should take care of the heavy cream taste. 

Sauteed Beef Tips with Shiitakes Mushrooms

(Printable Recipe)
Recipe adapted from Emeril Lagasse and the Food Network

Ingredients
2 tablespoons olive oil
1/2 pound beef sirloin tip, cut into 1-inch cubes
1 cup sliced Shiitake mushroom caps
1 medium yellow onion sliced
1 cup cleaned spinach leaves
1/2 cup white wine
3/4 cup beef broth
1 tablespoon heavy cream
1 tablespoon butter
Salt and pepper
Chopped green onion for garnish
Cooked rice

Directions

Heat the oil in a large skillet. Season the beef with salt and pepper, then sear it in the hot oil, making sure to brown it on all sides. Add the mushrooms and onions, toss, and continue to cook for 5 minutes. Add the wine and reduce 1 minute. Add the spinach and stock, reduce for 2 minutes. Add cream, butter, and season with salt and pepper. Garnish with green onions.

Serve over rice.

Sunday, November 15, 2009

Beef Stew and Some Special Rolls


Don't you just love the fall, it gives us all a good excuse to make that comfort food we have wanted since summer.  There's something about eating comfort food when the weather cools down, it........it just goes together like apple pie and ice cream, and baseball  and hot dogs.  That's why on this cold rainy Saturday I decided to make some beef stew. 

Everyone has their own recipe for beef stew and they think it's better than anyone else's, kind of like chili recipes.  Mine is no different than others I start with the basics of beef stew, beef, potatoes, carrots, onions.  I do add on item, taught to me by my grandpa, one or sometimes two whole yellow onions.  Do you see it in the photo to the right?  Swimming lazily in a sea of gravy. 
 
The other reason for making beef stew?  I get a chance to try Big Sis's Rosemary Rolls.  Of course I got to give the real credit to the blog she got the recipe from and that is Pioneer Woman web site.  If you want to see "real" photos of these rolls I suggest you visit both of their blogs because both are much better at picture taking then I am, but I manage to get by.

Hard to beat beef stew and homemade rolls on a cool, rainy Saturday afternoon while football games are on the T.V.

And look that onion is still enjoying life in gravy......but not for long.

Tuesday, October 20, 2009

Penne Pasta with Braised Beef Short Ribs

Since the blogs have really slowed down from everyone except big sis I thought it might be time to bring back my Sunday Dinner Episodes. I have been thinking about starting the episodes back up for some time now and since fall is here this is a good time. It's been busy the last couple of months with the bike riding vacation and another weekend spent in Pittsburgh with big sis. Other weekends were spent making apple butter and cranberry glaze, all for later.

But this past weekend I finally had time and thought I would get started on Season 2 of Sunday Dinner. Season 2 promises to be hipper, smarter, more colorful, and down right tasty. Well maybe not the first 3 but definitely more tasty. I will be trying recipes I stumble across, see on Food Network and maybe even a couple of my own concoctions I dream up.

I hope everyone is ready because it's time to roll....................

This weeks Sunday Dinner comes from our good friend on the Food Network Giada and is called Penne Pasta with Braised Beef Short Ribs. I watched this show a couple of weeks ago on Giada's new show called Giada at Home. As soon as I saw her pulling out the beef short ribs she had my attention. If you have never had beef short ribs you are really missing a treat.

I discovered beef short ribs by accident about three years ago when I was looking for oxtail for a recipe by Emeril. I couldn't find oxtail that day so the next best thing I found were the beef short ribs. Once I cooked them up for me and the wife we were both sold and have been cooking with them ever since. The wife will even tell you they are here favorite type of meat (me personally I still consider a thick ribeye steak my favorite type of meat).

Enough BS let's get on with this weeks episode.

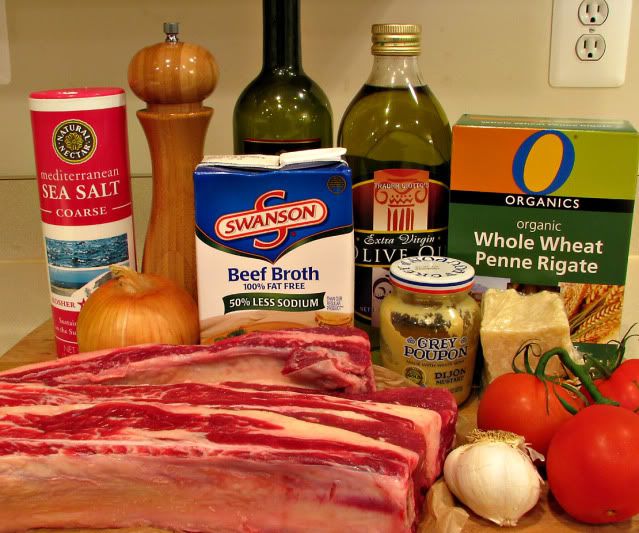
First we must introduce this weeks cast of characters.

Photobucket

I think I got everything into the picture this time. To be honest I normally forget an item or two and if you can keep a secret I will tell you one. I actually had another Sunday Dinner Episode that was to be my season premier but I forgot one of the main ingredients in the cast of character lineup. Not only that but I was going to do an episode on the cranberry glaze and I forgot one of the main ingredients in that cast too. Yep, now I know how big sis feels.

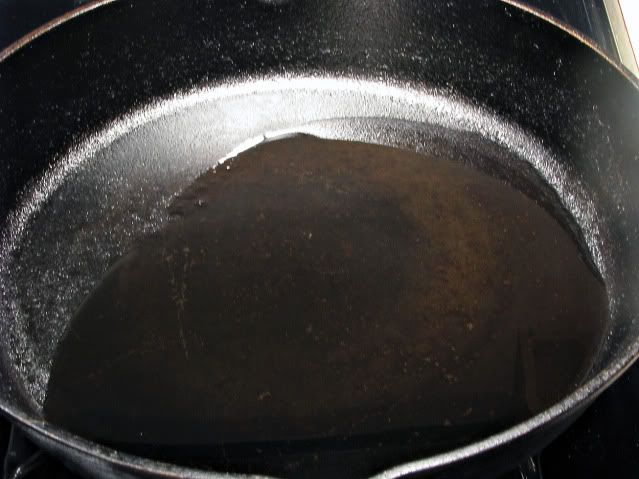
If you notice in the above photo the beef ribs are whole lengths. Normally you will find them cut into 2 to 3" pieces in the store but when I went to Whole Foods to pick these up the other day their band saw was broke and I had to take them whole, and beef ribs aren't something you just cut with a knife. If you notice in the next photo I am using my cast iron frying pan to cook in instead of my cast iron dutch oven. The ribs wouldn't fit in the dutch oven and barely fit in the frying pan after a little trimming here and there.

Start with a little oil in the pan, I always use extra virgin olive oil.

Photobucket

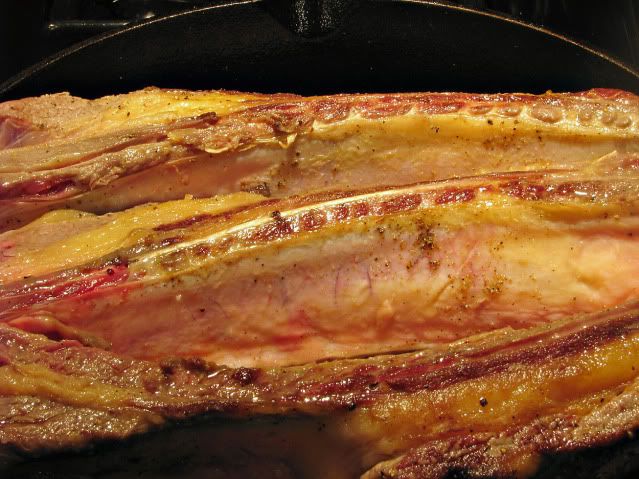
Brown the ribs....

Photobucket

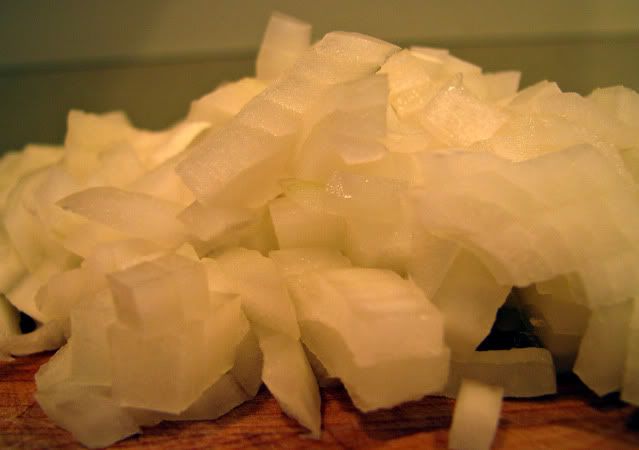
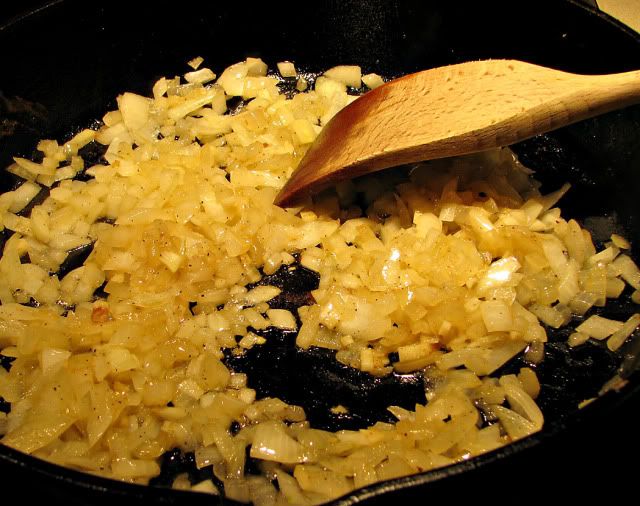
Chop up some onions.......

Photobucket

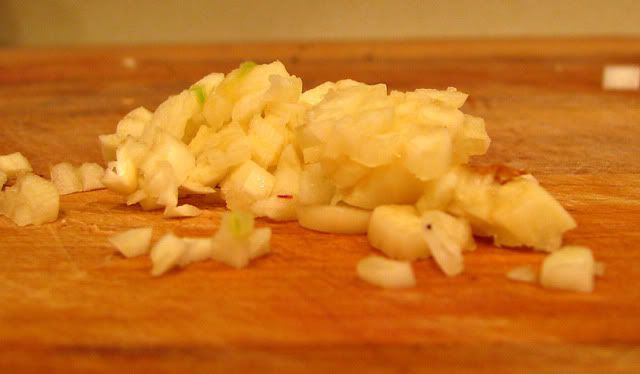
.....and garlic while browning the ribs.

Photobucket

Start cooking the onions and garlic while......

Photobucket

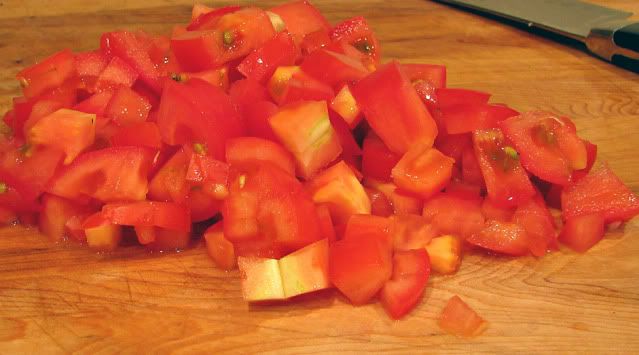
....chopping up the tomatoes.

Photobucket

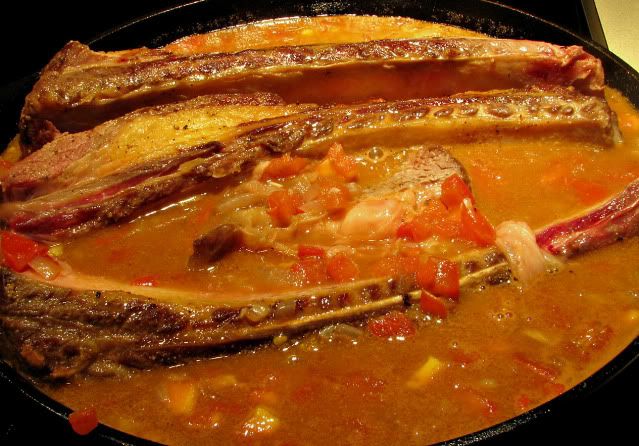
Dump everything into the pan, if you want the real directions read the recipe at the end of this post.

Photobucket

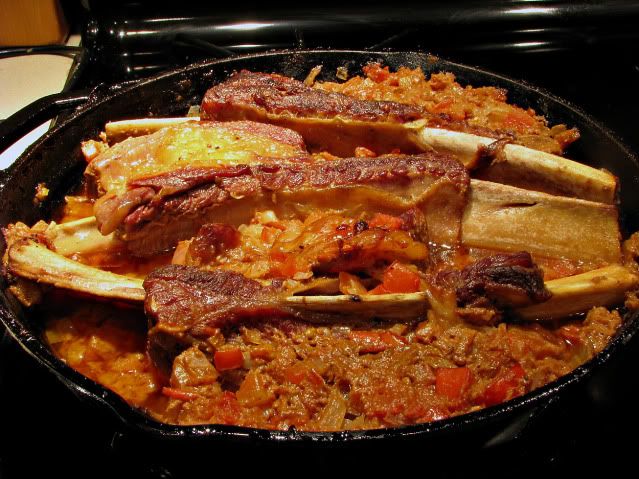
And 2-1/2 hours later, presto look what we have.

Photobucket

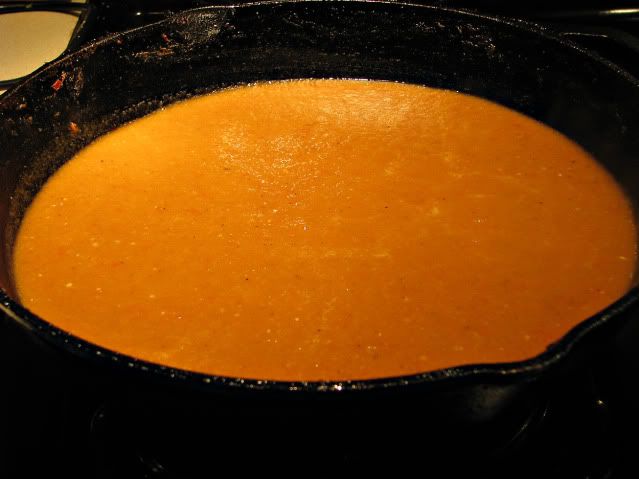
Take the meat out, get rid of the fat on top and blend the rest in the food processor. I got to be honest if the food processor is involved I'm there, I like watching the food processor do its job.

Photobucket

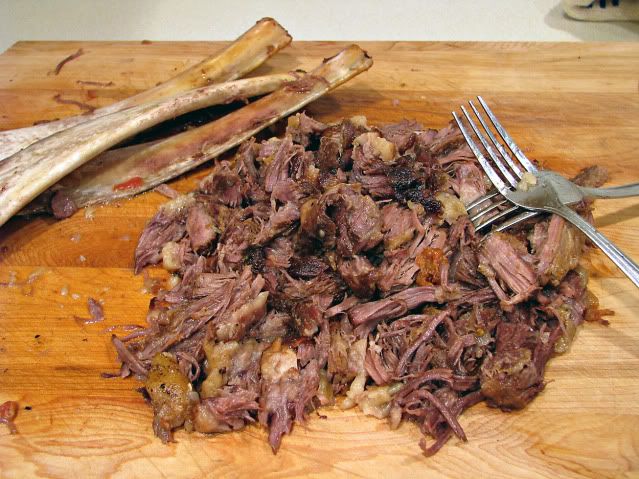
Pull the meat from the bones, shred.......

Photobucket

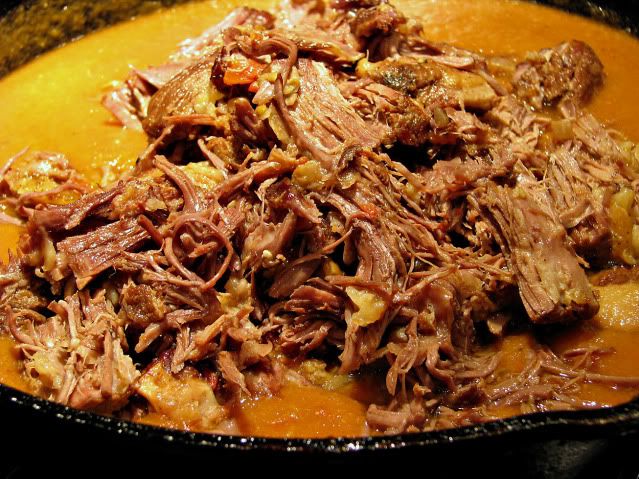
......and return the meat back to the pot or in this case the frying pan.

Photobucket

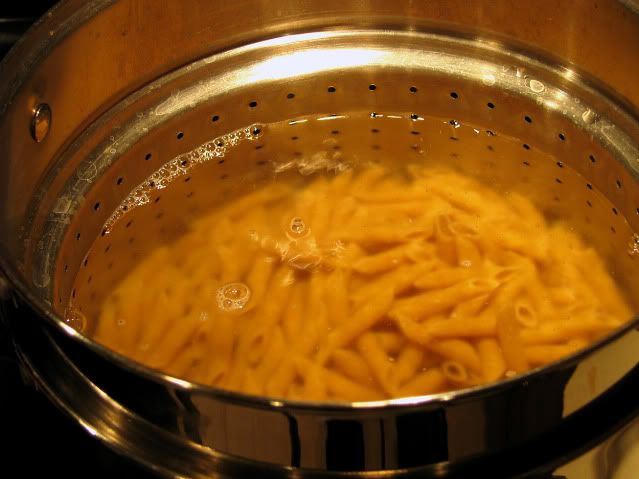
Now it's time to cook up the pasta. I don't think you need directions on how to cook pasta but here is an action shot of pasta cooking.

Photobucket

Pretty exciting eh?

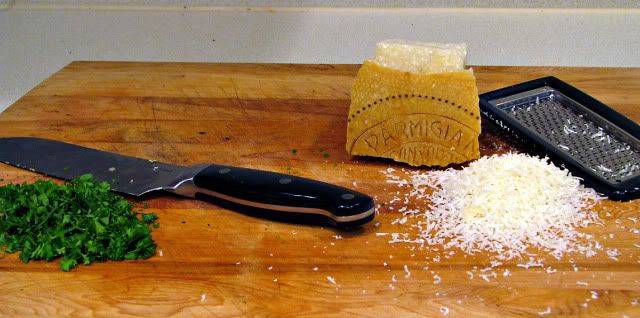
Next we cut up some parsley and shred some fresh parmesan-reggiano cheese.

Photobucket

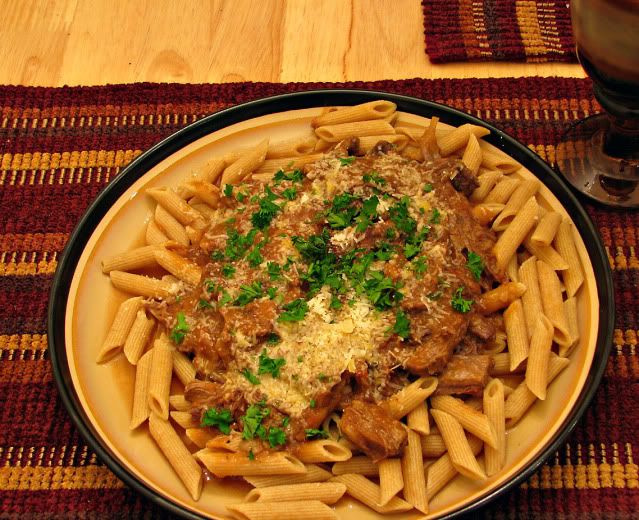
Put it all together and here is what you got.

Photobucket

Look good?

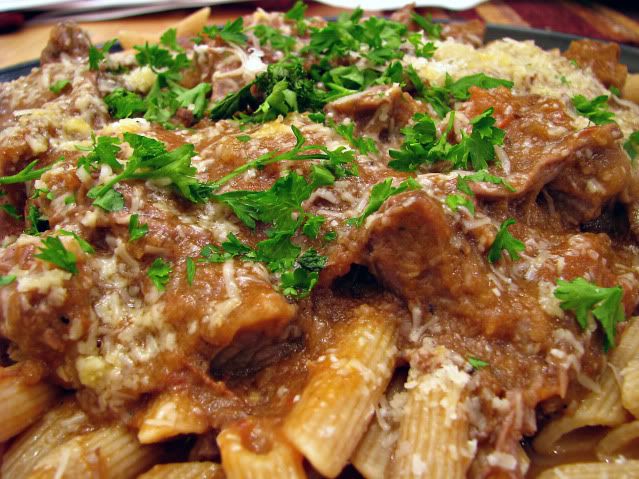
Here is a closer look.

Photobucket

Mmmm, it was good, good enough to rate a 4 out of 5 forks. Changes? Sure I will make changes to suit my taste next time but like always I try to stay true to the original recipe the first time.

If you want a real treat make enough so you will have leftovers for a quick meal on a weeknight. After we eat a meal like this on Sunday we always mix the pasta and whatever we fixed with it together and stick it in the ice box. That's what I did this time and when I pulled it out last night to warm up I thought it was looking a little dry so I went to work.

The first thing I did was open the ice box and staring me straight in the face were fresh mushrooms. 'Click' the light bulb goes on, "Mushroom gravy" I say. Quickly I make up some mushroom gravy and dump it in the pan with the short beef rib mixture. It's good but I am thinking what else can I do? I open the ice box again and what do you know staring me in the face again was sour cream. "Oh yeah" I think "Here we go, this will kick it up a notch." I throw in a couple of spoons of sour cream, ok so they were big spoons. I let everything cook for a couple of more minutes, throw it all on a plate and call it Tuesday night leftovers.

But wait a minute, "HOLY COW" I say to the wife "This stuff is good, real good." Amazing what you can do with leftovers. I had to give it a 4.75 forks out of 5. Why not 5 forks? Well I got another idea for that last 1/4 of a point and you will just have to wait for a future Sunday Dinner Episode or maybe I should call it Tuesday Night Leftovers and tell you about it then.

Penne with Braised Short Ribs

Recipe courtesy Giada De Laurentiis

Ingredients
4 pounds beef short ribs
Kosher salt and freshly ground black pepper
1/4 cup olive oil
1 large onion, diced
3 cloves garlic, coarsely chopped
5 Roma tomatoes cut into eighths
1 cup red wine, such as Cabernet Sauvignon
3 tablespoons Dijon mustard
2 cups low-sodium beef broth
1 pound penne pasta
1/4 cup freshly grated Parmesan
1/4 cup chopped fresh flat-leaf parsley

Directions

Place an oven rack in the lower 1/3 of the oven. Preheat the oven to 350 degrees F.

Season the ribs with salt and pepper. In a large heavy-bottomed Dutch oven or ovenproof stock pot, heat the oil over medium-high heat. In batches, add the ribs and brown on all sides, about 8 to 10 minutes. Remove the ribs and set aside. Add the onion and garlic and cook, stirring frequently, for 2 minutes. Add the tomatoes, wine and mustard. Bring the mixture to a boil and scrape up the brown bits that cling to the bottom of the pan with a wooden spoon. Return the ribs to the pan. Add the beef broth, cover the pan and place in the oven for 2 1/2 hours until the meat is fork-tender and falls easily from the bone.

Remove the ribs from the cooking liquid. Using a large spoon, remove any excess fat from the surface of the cooking liquid. Using a ladle, transfer the cooking liquid in the bowl of a food processor. Process until the mixture is smooth. Pour the sauce into a saucepan and keep warm over low heat. Remove the meat from the bones. Discard the bones. Using 2 forks shred the meat into small pieces. Stir the shredded meat into the sauce. Season with salt and pepper, to taste.

Bring a large pot of salted water to a boil over high heat. Add the pasta and cook until tender but still firm to the bite, stirring occasionally, about 8 to 10 minutes. Drain the pasta and place in a large serving bowl. Using a slotted spoon, remove the meat from the sauce and add to the pasta. Pour 1 cup of the sauce over the pasta. Toss well and thin out the pasta with more sauce, if needed. Sprinkle the pasta with Parmesan cheese and chopped parsley before serving.

Printed from FoodNetwork.com on Sat Oct 17 2009

© 2009 Scripps Networks, LLC. All Rights Reserved

Wednesday, November 19, 2008

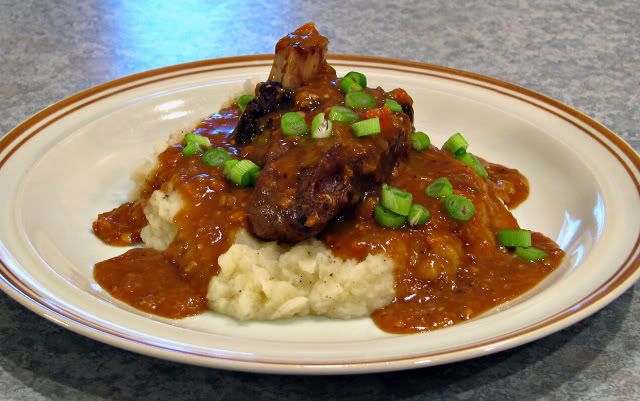
Beef Short Ribs with Garlic Mashed Potatoes

Beef short ribs who would ever thought they could be so good. A few years ago while watching Emeril Live he made a recipe using oxtail. It looked good so I went to the grocery store to buy oxtail. There was just one problem, it's hard to find oxtail and after looking and looking I finally decided to use beef short ribs instead. The beef short ribs soon became one of the wifes and my favorite meals. I did make some changes to the original recipe to better suit our tastes but the overall idea is still pretty close to the original recipe.

Photobucket

This is winter time comfort food at its best. I know its still fall but here in Wisconsin snow is already blowing in the air and we have had some on the ground too so I think that's close enough.

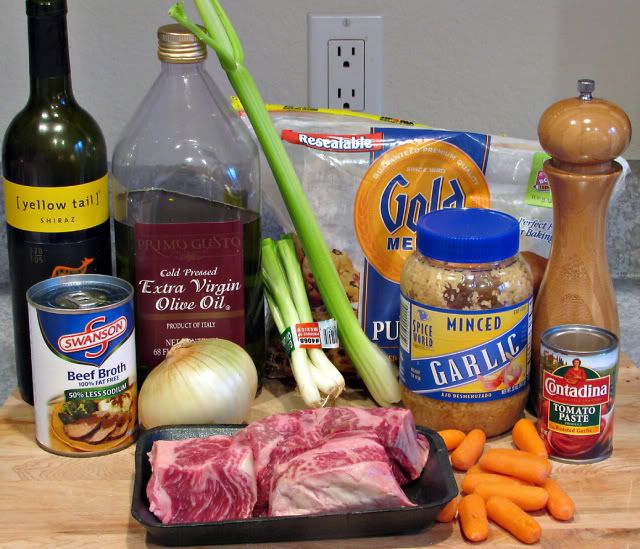
Let's introduce this weeks cast of characters

Photobucket

Pretty simple ingredients this week. I'll bet most people have this stuff already in their cupboard other than the short ribs and wine. The wine can be substituted with extra beef broth if one prefers.

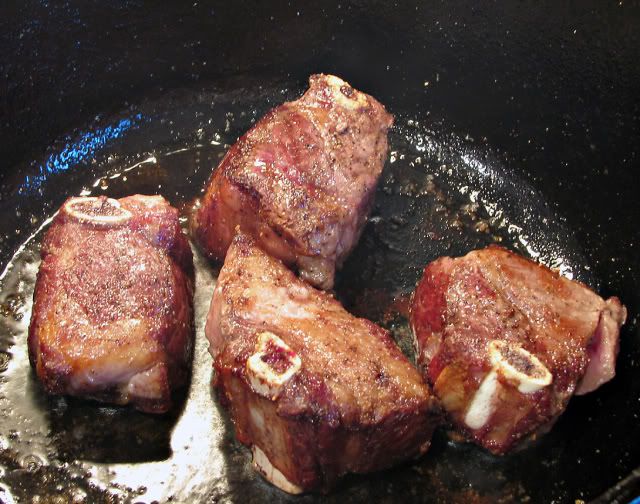
We must first start by browning the short ribs in our trusty cast iron dutch oven.

Photobucket

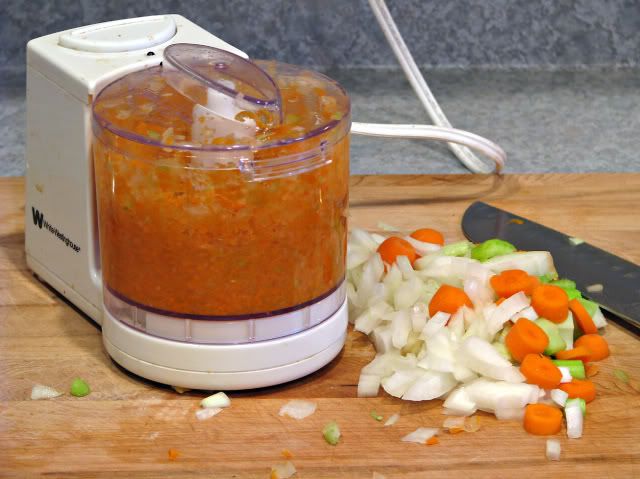
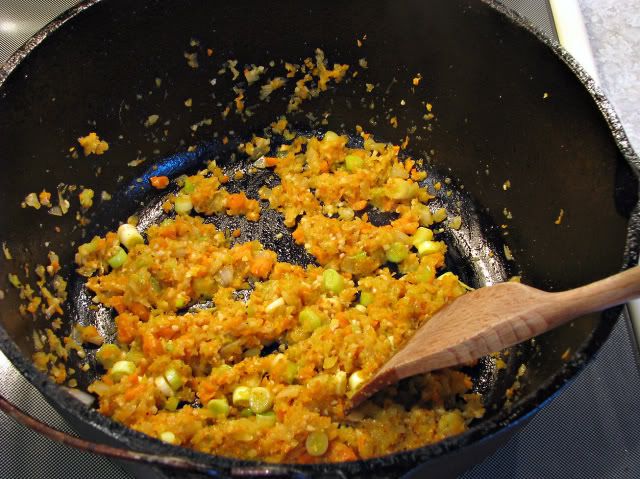
While the short ribs are browning we might as well make good use of our time and mince up some veggies with the food processor.

Photobucket

Pretty sad excuse for a food processor eh? Hey it gets the job done even though it takes three loads to process the veggies. Once the short ribs are browned it's time to start cooking our minced up veggies we worked so hard to get ready. After the veggies cook for a few minutes it's time to add tomato paste and flour.

Photobucket

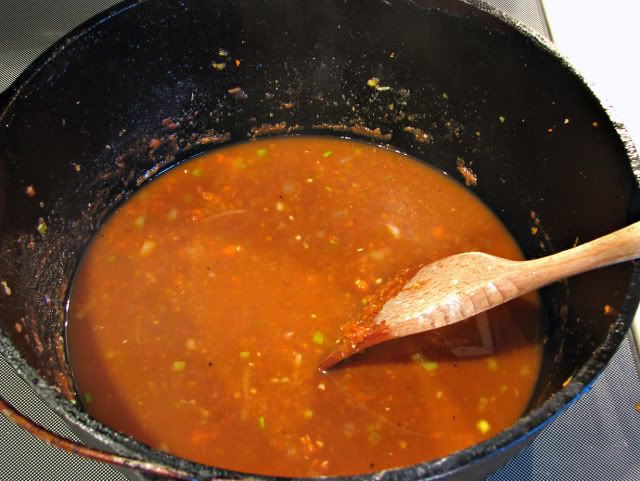
Next we add the wine and let cook for a couple of minutes and then the beef broth. Like I said earlier if you don't want to use the wine just use all beef broth. The original recipe from Emeril actually used beer instead of wine. Since I am trying to be a little more sophisticated these days I chose the wine plus I already had a partial bottle in the refrigerator already.

Photobucket

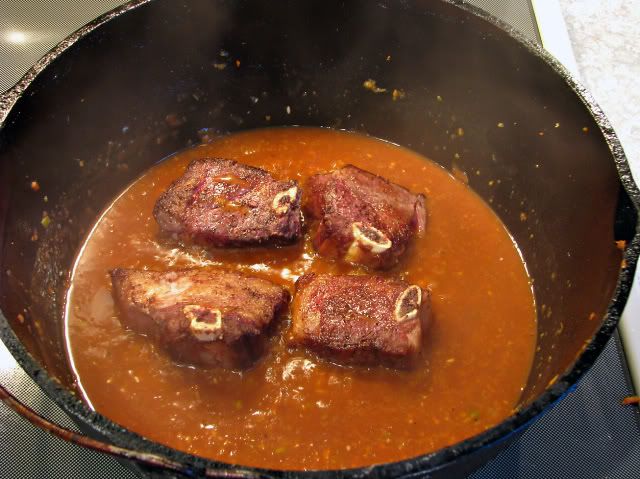
It's time to bring everything up to a boil and then turn down the heat and let simmer for 5 minutes or so. Now it is time to add the beef short ribs back to the gravy and let cook for 2 hours, with a lid on of course.

Photobucket

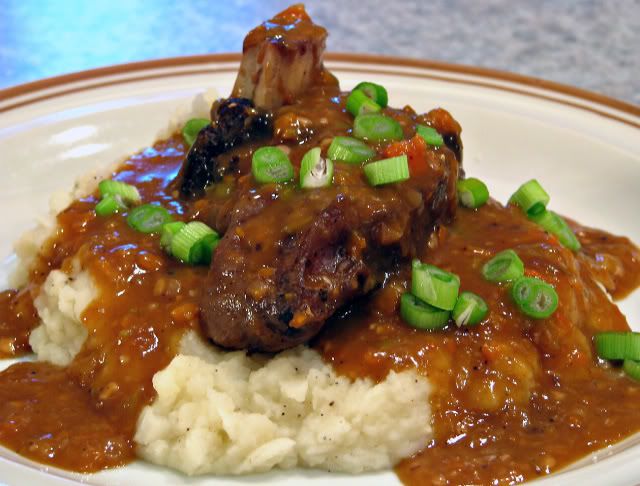
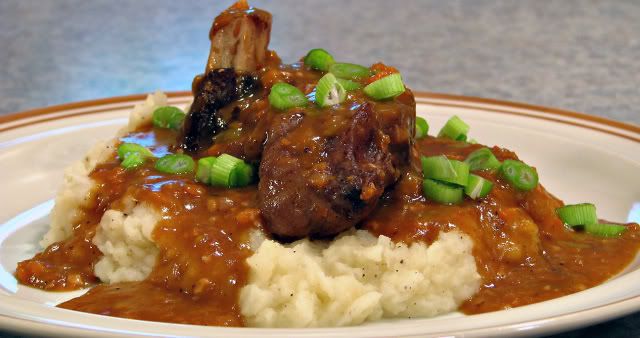
After everything in the dutch oven gets happy it's time to serve over garlic mashed potatoes.

Photobucket

Mmm that's some good grub there folks. I make this 3 to 4 times a year and never get tired of it. And the big bonus is it's so simple to make.

Photobucket

Beef Short Ribs Over Mashed Potatoes

. 2 tablespoons olive oil
. 3 pounds Beef Short Ribs
. 2 teaspoons salt
. 1 teaspoon freshly ground black pepper
. 1 cup diced onion
. 1/2 cup diced carrot
. 1/2 cup diced celery
. 1 tablespoon minced garlic
. 2 teaspoons minced ginger
. 1 tablespoon minced green onion, white part only
. 2 tablespoons tomato paste
. 2 1/2 tablespoons all-purpose flour
. 1 cup red wine
. 1 1/2 cups low-sodium canned beef broth

Directions
Add the olive oil to the Dutch oven and heat over medium heat until hot. Season the short ribs with the salt and pepper. Brown short ribs on all sides, about 3 to 4 minutes per side. Set the seared short ribs off to the side.

Mince onion, carrot and celery in food processor.

Once all the short ribs are browned, add the onions, carrots and celery to the pan. Sauté the vegetables until softened, about 3 to 4 minutes. Add the garlic, green onions and ginger to the pan and sauté for 1 minute, stirring often. Add the tomato paste and stir well to incorporate. Sprinkle the flour over the vegetables and stir to combine. Cook, stirring, for 3 minutes. Add the wine to the Dutch over and increase the heat to medium-high. Bring to a boil and cook for 5 minutes.

Add the stock, stir, and return the short ribs to the pan. Return the pan to a boil and place the lid over the pan. Once a steady stream of steam is emitted from the pan, lower the heat to a simmer, and cook the short ribs until tender, about 2 hours in a Dutch oven. Remove the lid, and serve immediately over mashed potatoes. Garnish with green onions or chives.