Monday, November 30, 2009

Scallops with Garlic Basil Linguine


Yippie kay yay the wife is gone and it is time for some seafood, well not yippie kay yay the wife is gone but YIPPE KAY YAY it's time for seafood.  It is a tough call which I like better shrimp or scallops, probably comes down to what day you ask me, some days I will pick shrimp and others scallops. 

When I lived in Wisconsin, or for the matter Michigan, fresh seafood was hard to come by.  There was a good seafood market in Sheboygan but they certainly didn't have the choices we have here in Maryland.  Here in Maryland I have choices, I can go to the Maine Avenue Fish Market in D.C or one of the local Whole Foods Markets.  The Whole Food Market is easier but if given the chance I go to the Maine Avenue Fish Market. 

This episode starts off with very few and simple cast of characters.

I chose the garlic basil linguine for this meal because 1) when I saw it at Trader Joe's a week a go it looked good and 2) it was already in my refrigerator (yes we keep our pasta in the refrigerator and don't ask me why because I can't tell you). 

We start by browning the scallops in the olive oil and butter.  To get the tasty caramelizing on the scallops make sure you dry them off before you put them in the pan because if you don't all they will do is steam.


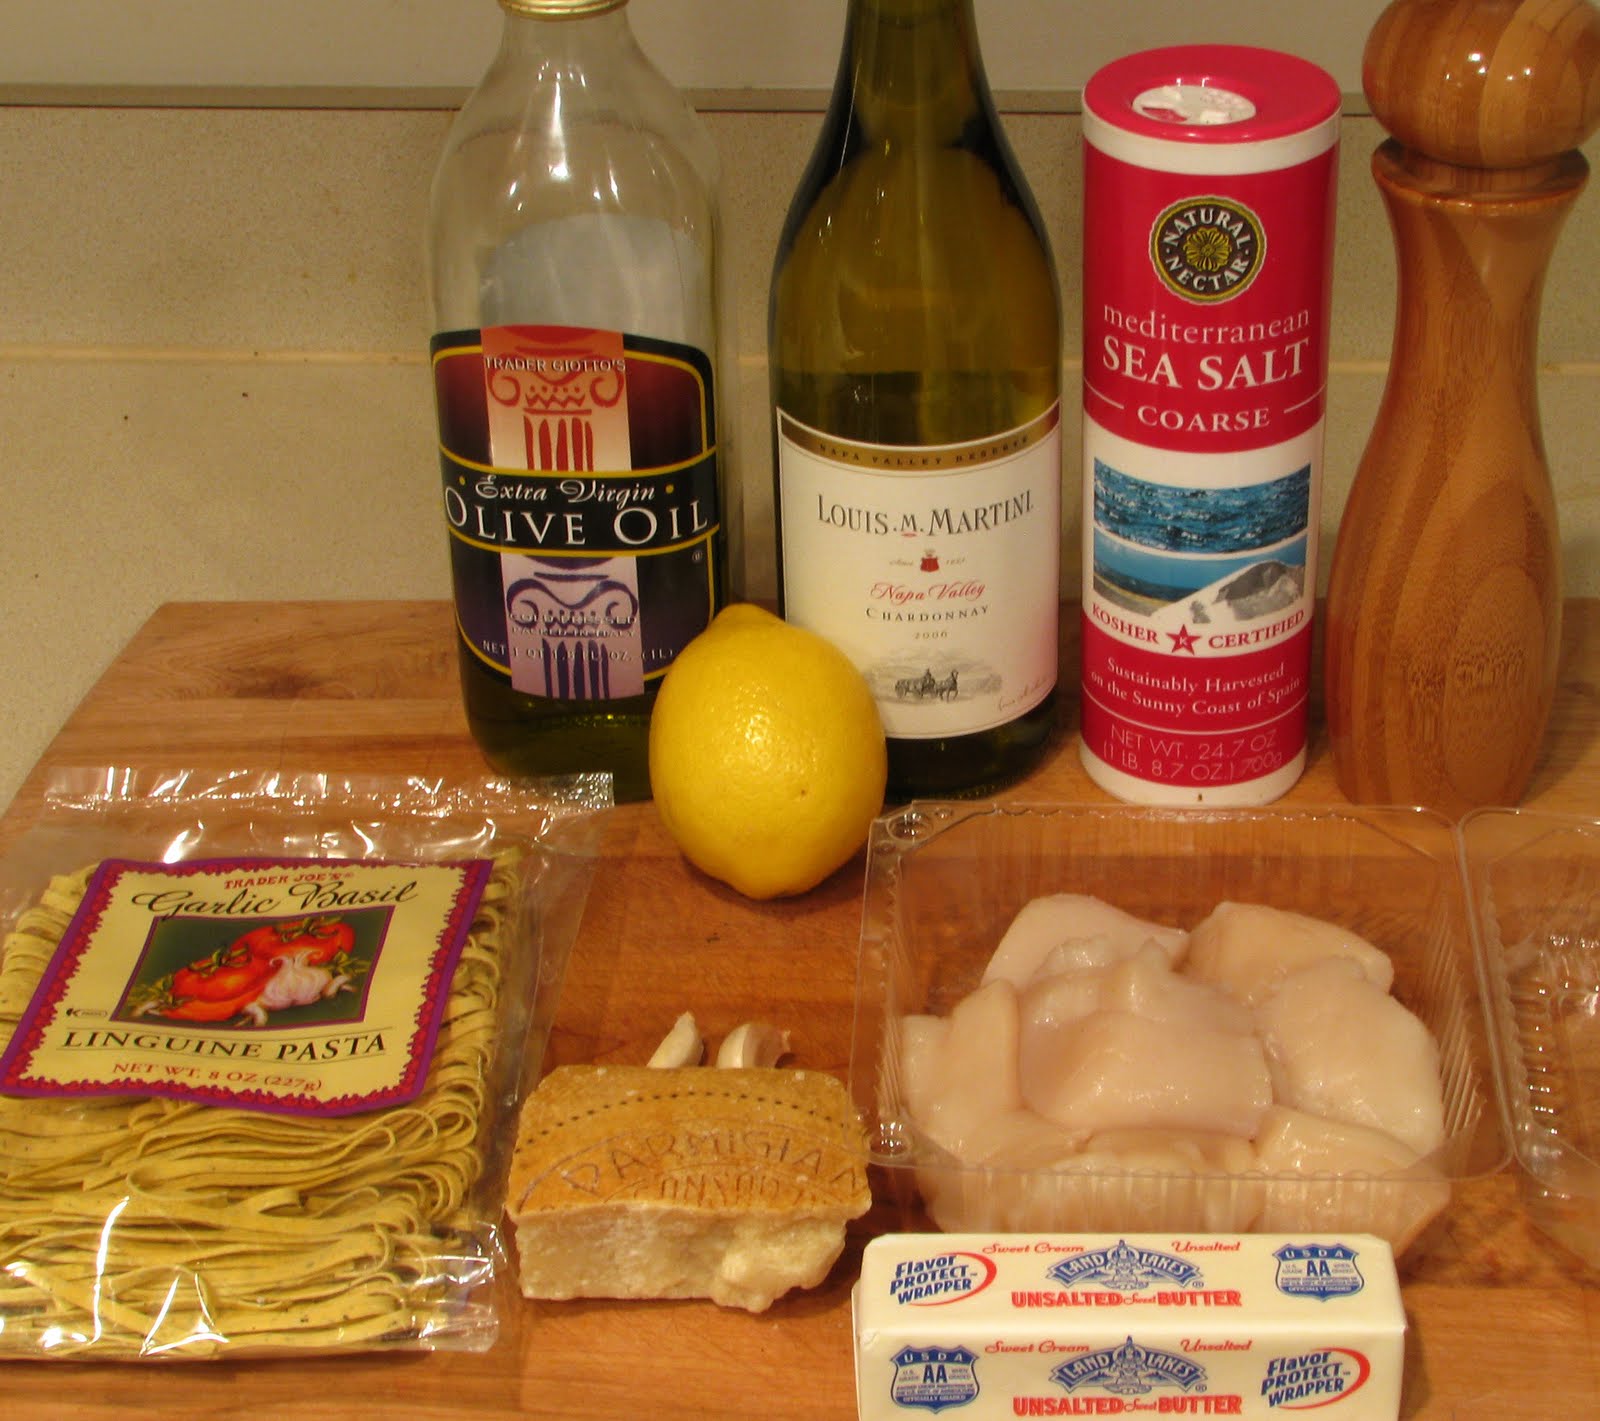
Once the scallops have the wonderful caramelizing on them it's time to remove them from the pan and deglaze the pan with a little white wine.  I'll be honest here and tell you I am not a wine drinker, if fact I can't stand the taste of the stuff but I do like cooking with it.  Tonight was a special because I got to open a new bottle of wine.  I use the wine to clean all those delicious brown bits of goodness off the bottom of the pan so you can pour it over the top of the scallops and finish them off with style.


Not only are scallops my favorite seafood item (at least for today)  I think they are my favorite type of food period.  The scallops have succulent sweet flavor unlike anything else you have ever eaten.  This particular meal had a hint lemon flavor (probably because I used lemon juice huh?).  I have to rate this meal a 5 out of 5 forks because after it is scallops and how can you go wrong with that.  I should mention the linguine from Trader Joe's was good too.  The basil flavor really came through the linguine and I could also taste a hint of garlic.  I would definitely use it again and I will probably use it in other meals as well.

Scallops and Linguine in White Wine Sauce
Ingredients
1 tablespoon unsalted butter
1 tablespoon olive oil
1 pound fresh scallops
8 oz. Linguine Pasta
2 cloves Garlic, thinly sliced
1/2 cup White Wine
1 fresh lemon
Salt and pepper to taste
Parmesan Cheese

Instructions
Bring to as boil salted water and add linguine and cook until al dente, tender-firm.

Preheat skillet over medium high heat. Add butter and olive oil. Add garlic and cook for 1 minute or until fragrant. Meanwhile dry off scallops and salt and pepper. Add scallops to skillet and cook for 2 minutes or until browned. Turn over and cook for 2 more minutes until cooked through being careful to not over cook. Use ½ of lemon over scallops and remove from pan.

Add white wine and deglaze pan, reduce for about 1 minute and add other half of lemon juice.

Start with linguine on plate, add scallops, pour reduced white wine from skillet over scallops and garnish with parmesan cheese.

Friday, November 27, 2009

Open Face Turkey Sandwich with Cranberry Bread


Well the big day finally arrived, the day when you can eat whatever you want and not feel guilty.  This is the real Thanksgiving, the day when food is king.  The wife and I had our Thanksgiving early this year because she was going back to Michigan to visit the little granddaughter while I decided to stay here and work, really, well not on Thanksgiving but the rest of the weekend.  Like everyone else I too had to plan my Thanksgiving meal but unlike most mine was already half made.  Yep I had leftovers from our Early Thanksgiving Dinner.  Instead of calling this Leftover Wednesday this week we can call it Leftover Thanksgiving it's just a day late and happens to be Thanksgiving. 

Since I am getting tired of posting Thanksgiving meals we are going to cruise through this entire meal in one post.  This is a warning because I have lots of pictures and two recipes down below ready for you to try.  So without further adieu let's roll.....

The first cast of characters we will start with today is the gravy.  Yeah I know I might have just lost some of my family because of their distaste of gravy but this gravy recipe is worth it. 

This is another recipe from the Tyler Florence cooking show we went to in downtown D.C. a couple of weeks ago and once again after I watched him make this I knew I had to try it.  If you read the recipe down below you will notice that recipe calls for roasting the turkey wing first but at his show he used smoked turkey wings, that's what caught my attention.  If you do use smoked turkey wings you don't have to roast them again (just thought I would throw that in there just in case you were wondering). 
The gravy is really pretty simple, start with cooking the veggies and herbs for a few minutes and then after that everything goes into the pot, just like cooking stock.  One other change I should note is when Tyler cooked this gravy at his show he used chicken broth instead of water like the recipe below.  I used some of my special homemade chicken broth I made about a month ago along with a little water.  I wasn't too worried about having extra broth left over because I can always find uses for it.  From here it was time to watch some football and let this simmer away on the stove for about 2 hours.

After a couple of hours I strain all the extras out and then use my gravy separator to get rid of the fat.  Now this can be set aside because we got other things to do and introduce another cast of characters.


I'll admit if you look at the above pic and look at the recipe below you will notice not all the characters are in the photo.  The problem was I had a recipe for cranberry bread I had found on a blog that sounded pretty good but when I got everything mixed together something didn't seem right.  The batter (for all you bakers out there is that what they call it)  seemed real dry.  This was heading for disaster real quick.  What to do, what to do?  Quickly I went to the Food Network website and went to my recipe box (if you don't know you can keep your own recipe box on the Food Network website) where I had saved a cranberry bread recipe from Emeril.  Sure enough Emeril's recipe called for much more liquid than the one I was using.  Time to adapt, overcome, persevere and I did just that.  Like I said above I had already started with one recipe so what I did is combine Emeril's recipe with what I already started.  My recipe below is the results.

When everything was said and done it reminded me of pancake batter.  Hm-mm, I wonder?  Maybe another post for another day?  Let's wait and see.


Doesn't look to bad for a first timer now does it?  With all the drama involving the first batter I made I wasn't too sure what I was going to be left with in the end but so far this is looking like a loaf of bread.

Now that the cranberry bread is made we can get back to our turkey gravy.  We left off with our broth made and now it's time to finish the gravy.  The first thing to be done is to make a roux.  For you first timers out there a roux is nothing more than equal part fat (in this case olive oil and butter) and flour mixed together over medium heat.  Some people think you have to use a wooden spoon but I'm not sure that really matters but what does matter is to keep stirring until you get the color of roux you want (this is really important if you are making gumbo).

Now if you just hang with me a little longer we are almost finished.  To the roux we can now add the broth we made earlier with the smoked turkey wings until it gets to the desired thickness we want.

Here is where the leftovers come into play.  If you remember a couple of days ago I posted our main entree from our Early Thanksgiving Dinner, Sausage and Cranberry Stuffed Turkey Roll.

This is our chance to use the rest of the leftover turkey up.  I gently slide the turkey into the gravy we just made and let it take a 15 minute bath to warm it up a bit. 

We are almost there and this is the fun part, we get to put the whole thing together.  First we slice up some of the good looking cranberry bread up.


 Lay a couple of pieces (or more depending how hungry you are) on the plate and top with the warmed up turkey and gravy (pretty simple eh?).  Of course I am not done there I got a little side to put with it.  Remember Part I of our Early Thanksgiving Dinner?  If you need a reminder here it is....

Yep it's Jock's Cranberry Sauce, what a better way to compliment and Open Face Turkey Sandwich with Cranberry Bread.  Now everything is in its place and here is my Thanksgiving Dinner...

Mmm, mmm, now that's good grub. 

As far as ratings go I am giving Tyler's Turkey Gravy a hearty 5 out of 5 forks.  Simply put this is the best gravy I have ever ate.  The smoked turkey wings added a whole new depth of flavor to the gravy, something that just can't be duplicated by roasting the turkey wings.  If you ever decide to make this definitely find smoked turkey wings it will be worth it.

Now for the cranberry bread, it gets a 4 out of 5 forks only because I need to go back and follow Emeril's recipe a little closer next time.  If you notice I made the cranberry bread with raw cranberries mixed directly into the batter, Emeril cooks his cranberries first in his recipe and I think this may take out a little of the bitter taste my bread has when you bite into a cranberry.  It is only a slight bitterness so it really isn't too bad.  (And yes dear, I still have some cranberries left over so I can make you some cranberry bread when you get home because I know you will want to try it.) 

That pretty much does it for this Thanksgiving year and I think it is time to move on to other things.  I'm not sure where we will head but I have a couple of ideas like one more thing with cranberries and possibly something to do with pumpkin.

Stay tuned.

Jock's Cranberry-Pecan Bread

Ingredients:
1/2 cup fresh squeezed orange juice
1 cup sugar
1/2 teaspoon cloves
1 1/2 cups fresh cranberries (or defrosted if frozen)
1/2 stick unsalted butter, melted
2 large eggs
1 cup of unbleached flour
1 cup whole wheat flour
1/2 teaspoon baking soda
1/2 teaspoons baking powder
1/2 teaspoon ground cinnamon
1/2 teaspoon salt
3/4 cup buttermilk
1 cup chopped, toasted pecans
1 teaspoon orange zest
1 teaspoon grated ginger

Directions

Preheat the oven to 350 degrees F. Lightly grease a 9 1/4 by 5 1/4 by 2 1/2-inch loaf pan.

Combine the all the dry ingredients in a bowl and mix thoroughly. Add the wet ingredients together and mix thoroughly. Pour the wet ingredients onto the dry and mix together. Fold in the cranberries and toasted pecans.

Pour into the prepared loaf pan. Bake until a tester comes out clean, 55 to 60 minutes.

Turn out onto a wire rack to cool. Serve warm or at room temperature.

Turkey Gravy

Recipe courtesy Tyler Florence
Prep Time: 10 min
Inactive Prep Time - Cook Time: 2 hr 45 min
Level: Easy
Serves: 5 to 6 servings

Ingredients
2 pounds turkey wings
5 tablespoons extra-virgin olive oil
1 medium onion, halved
4 carrots, chopped
1 head garlic, smashed
2 sprigs fresh sage
2 sprigs fresh thyme
2 sprigs fresh rosemary
8 black peppercorns
2 tablespoons unsalted butter
1/4 cup all-purpose flour
Kosher salt and freshly ground black pepper

Directions
Heat the oven to 375 degrees F.

Put the turkey wings (also backbone and neck if you have it) into a small roasting pan and roast them until they are golden brown, about 30 minutes. Heat 3 tablespoons olive oil in a large stock pot over medium-high heat. Add the onion, carrots, garlic, herbs, and peppercorns and cook for 5 minutes. Add the turkey wings. Pour some water into the roasting pan and scrape up all the browned bits on the bottom; add this to the pot. Cover everything in the pot with cold water by 1-inch and bring to the boil, skimming any foam that rises to the surface. Reduce the heat and simmer for about 1 1/2 to 2 hours.

Strain out the solids and discard. Wipe out the pot and put it over medium heat. Melt the butter with the remaining 2 tablespoons olive oil and add the flour. Cook this roux, stirring frequently, until it is golden brown. Slowly whisk in the strained stock being careful to work out any lumps. Cook until the gravy has thickened, about 10 to 15 minutes.
Printed from FoodNetwork.com on Thu Nov 26 2009
© 2009 Scripps Networks, LLC. All Rights Reserved


Thursday, November 26, 2009

Sausage and Cranberry Stuffed Turkey Roll


Finally we have arrived to the final episode of the Early 2009 Thanksgiving Episode and as with any grand finale we finish with the star of the show, the turkey.

Since it is only myself and the wife we really don't need to cook a whole turkey, besides everyone else cooks whole turkeys and I wanted to do something different.  Our choice this year was to cook a turkey breast.  We searched store after store the weekend before Thanksgiving not having much luck until I walked down the street to our local market and found one, figures maybe I should have started there.  The turkey breast is a good place to start for two people but that is still a lot of meat plus a turkey breast by itself is hard to stuff and I wanted to do some sort of stuffing this year.  What to do, what to do.  After much thought I finally came up with the idea of filleting half the breast off the bird, pound the breast out, and then roll the stuffing up inside the turkey.  Another plus is I still have another half of boneless turkey breast for a future episode of Good Grub.

Once the one half the the turkey breast is ready it is time to think about the stuffing.  The cast of characters for the stuffing include:


I had an idea for stuffing that included sausage and cranberries, not just any cranberries but my cranberry sauce.  Now you know why I had to start this four part series with the cranberries.  I made the cranberries ahead of time with the stuffing in mind.  The problem I ran into was finding a recipe for stuffing that included cranberry sauce and sausage.  I searched  and searched the Internet with no luck so I did the next best thing, made one up myself based on some ideas I found from several other recipes.  As you can see I wanted to keep it simple, I'm all about simple, not only for the ease of making the stuffing but I also knew I wouldn't be able to fit a complicated stuffing into a rolled up turkey breast.  I also knew using traditional style croutons would be out of the question so I came up with the next best thing and made bread crumbs with the food processor.  I thought this was a good compromise for stuffing with the only question being should I toast them or not.  In the end I decided not to toast them I was afraid if I did toast them it might dry out the turkey breast and as we all know it is a fine line between nice moist succulent meat and dried out shoe leather.

After the ingredients for the stuffing were decided on it is only a matter of preparing them for the bird. Obviously the sausage had to be cooked ahead of time so I decided towards the end of cooking the sausage I would add the cranberries, sage and bread crumbs. 

It sure looked good and it even tasted good, good enough to make a meal by itself but let's not get sidetracked, maybe another day. 

The real problem we face now is how to get the stuffing into the turkey breast.  I did find a couple of recipes that described pounding out the breast, similar to what you would do with a chicken breast, and if I was going to stuff this bird that is what I was going to have to do.  Since I don't own a mallet for pounding our meat I used and can from the pantry, works for me.  First I covered the breast with plastic wrap and then pounded the breast out.  Next put the stuffing mixture on one end and then roll the breast up to form a turkey roll.

The only thing left to do is get get this bird in the oven but before I do that I decided to put some smokey bacon on the turkey roll up and see if it would help keep the breast moist.  I actually got this idea from Tyler Florence when we went and watched his cooking demonstration a couple of weeks ago in downtown D.C. I wasn't really sure about this step but I wanted to try it and beside if bacon is involved it can't be a bad thing.
After letting it cook for 1-1/2 hours at 350 degrees I pulled it out of the oven.


I think we are making progress now.  All there is left to do now is to get this thing on the table after we give it a little rest.  After a little nap time we can cut and serve.

Looks pretty good for something I pulled out of my ass head.  I'll have to give this a 3.75 out of 5 forks.  It had good flavor and the bacon gets credit for that. I think I overcooked the turkey just a little but the breast still was moist. 

I think to make it better next time I will use a little less sausage and a little more bread crumbs, cranberry sauce and sage but I think I am on the right track.  Next time I will brine the breast before I start too.  I almost always brine my turkeys because I think it makes them much more moist and juicy but I decided to cook this one with brinning.  Also why we are on next times I think next time I will omit the bacon because the skin doesn't get nice a crispy like turkey skin should be.  And besides I won't need the bacon once I get my charcoal grill back that will impart all the extra good smokey flavors I want.

Overall a pretty darn good Early Thanksgiving Meal with an overall rating of 4 out of 5 forks. 
My goal this year was to do something a little different than normal and I think I accomplished that.  In  Sportscenter fashion let's recap this years Early Thanksgiving Meal:
Happy Thanksgiving and don't eat too much.

Tuesday, November 24, 2009

Whipped Sweet Potatoes and Bananas with Honey


Tonight is part III of our Early Thanksgiving Dinner and it features something we watched Tyler Florence make a couple of weeks ago when we went to one of his shows in downtown D.C.  He put on a great show by preparing a Thanksgiving meal for us.  He made the normal turkey, dressing, cranberries and Whipped Sweet Potato and Banana with Honey dish.  Whoa there, what did he just write?  Whipped Sweet Potato and Banana with Honey?  Yep you read that right that's what I said and if you know me you know I don't even like sweet potatoes.

Tyler promised if you make this it will forever change the way you make sweet potatoes, he said this is the ultimate in sweet potatoes.  After watching him make them I decided this is something I would have to try, after all how can you go wrong with bananas and honey.

I didn't change anything from his recipe because I wanted to sample his version exactly the way he made it that day.  The cast of characters is pretty normal with the only odd ball being those pesky sweet potatoes.

  As you can see lots of good ingredients, bananas, butter, pecans, brown sugar, starting to sound more like a dessert than a side dish for Thanksgiving.


The first thing we have to do is roast the potatoes and bananas.  Tyler told a funny story when he was preparing this recipe about the first time he went to his future in-laws house for dinner.  His soon to be mother-in-law put the sweet potatoes in the oven and it wasn't long until they starting hearing exploding sounds coming from the kitchen.  Apparently she didn't poke holes in the potatoes and they exploded in the oven.  Tyler said they had no clue who he was or that he was a chef so when this happened he said "Move over, professional chef here, let me take over."  Pretty funny story when he tells it.  Anyway the moral to the story is to always pierce your potatoes before you bake them.

If you noticed in my ramblings I said to roast the bananas too.  I'll admit I have never actually heard of roasting bananas until that day.  Tyler did explained that they will look terrible when they come out of the oven but on the inside will be sweet banana delight.  What can I say  he was right.


Once everything is roasted the banana and sweet potato goes into a mixing bowl (of course you scrape the insides out of the skins) along with the honey and butter, it just keeps getting better.

We still need to make a topping for the sweet potatoes and bananas and this is where it really reminds me of a dessert, not that that is a bad thing.   The topping consist of more butter (EGADS!), pecans, and brown sugar, a tough combination to beat over anything. 

How did it turn out?  I am giving this one a 4.75 out of 5 forks, after all it still has those pesky sweet potatoes in it.  Tyler really came up with a winner here and I definitely recommend this to anyone who likes or dislikes sweet potatoes.  This recipe turned out to be the star of the entire meal this year and will certainly find a place on our Thanksgiving Dinner table for now on.

Whipped Sweet Potatoes and Bananas with Honey
(Printable Recipe)
Recipe courtesy Tyler Florence

You can roast the potatoes and bananas ahead of time, then put it all together just before serving. Then heat it up in the oven.

Prep Time:20 min
Inactive Prep Time:--Cook Time:1 hr 5 min
Level: Easy
Serves: 10 to 12 servings.

Ingredients
•5 medium sweet potatoes, scrubbed
•4 bananas, unpeeled
•1 cup (2 sticks) unsalted butter, at room temperature
•1/4 cup honey
•Kosher salt
•1/2 cup all-purpose flour
•3/4 cup dark brown sugar
•1 1/2 cups pecans, chopped

Directions
Preheat the oven to 375 degrees F.

Prick the sweet potatoes all over with a fork, put them in a roasting pan and roast for 30 minutes. Toss the bananas into the pan and continue roasting for 10 to 15 minutes, until both the bananas and potatoes are very soft. Remove the pan from the oven but don't turn the oven off.

When the potatoes are cool enough to handle, scoop out the flesh into a large mixing bowl. Peel the bananas and add them to the bowl along with 1 stick of the butter, and the honey. Season with salt and beat vigorously with a wooden spoon until everything well combined and the mixture is fluffy. Spoon into an oven-proof serving bowl and smooth the top.

In a separate mixing bowl, use your fingers to rub together the remaining stick of butter, the brown sugar, flour, and pecans until the mixture is the consistency of coarse crumbs. Sprinkle the crumb mixture over the sweet potatoes and return to the oven. Cook for about 20 minutes, until the crumbs are golden. Serve hot.

Printed from FoodNetwork.com on Sun Nov 22 2009
© 2009 Scripps Networks, LLC. All Rights Reserved

Monday, November 23, 2009

Honey Wheat and Rosemary Rolls


Part II of this years Early Thanksgiving Dinner Episode begins with Big Sis's Rosemary Dinner Rolls, which she borrowed from Pioneer Woman web site, with my twist.  I really didn't want to put my own personal twist to this recipe since it looked simple and looked like it would taste good but I didn't have a choice.  You see for reasons unknown to me we can't find frozen dinner rolls around here.  For that matter we can't even find frozen bread dough around here, go figure.  So what do you suppose I do?  How about make them myself and while we are doing that we might as well do something different.

Since I know little to nothing about baking my first task is to find a recipe I can follow or at least get started with.  My choice was to go the King Arthur Flour web site and see what I could find there.  After a long search through their recipes I finally found one I could use or at least adapt to the ingredients I had on hand.  I decided on King Arthur's Honey Wheat Rolls.  Since I am trying to get more wheat flour in my diet I thought these rolls would be a good place to start, besides honey in anything can't be a bad thing.  I did say adapt because if you look at their recipe it includes instant potatoes and dry milk, a couple of items I don't have on hand and don't intend to have on hand.  So I adapt, overcame and conquered and this is what I came up with....

There is one odd ingredient, at least to me, and that is the orange juice.  Orange juice?  I am just as surprised as you are.  In the comment section fore the recipe in King Arthur's web site someone said the orange juice takes out some of the bitterness of the wheat flour and you won't taste the orange juice in the rolls either.  Hm, since I really don't know I'll take their word for it.

I probably don't need to go through all the motions on the hows and whys of bread making but if you really need to have better directions I suggest you visit the King Arthur web site, a real fine web site for breads, rolls and many other good foods.

I will say I always sift my flour regardless of what I am making.  It helps to get rid of any flour "balls" that seem to show up in bags of flour.

I also use our Kitchen Aid mixer with the bread hook for kneading the dough too.  Once the dough in kneaded I goes in a lightly oiled bowl to take a nap for a couple of hours.  This is the part I like because I get to sit down and watch some football, hard to beat that.  I probably don't have to preach the virtues of cast iron either, you have all heard or read it before.  So if you are wondering how they came out I would have to rate them a 4 out of 5 forks.  For my second time every baking rolls I know I can improve but I think I am on the right track.  I like the wheat flour mixed in with regular white flour, and of course the honey doesn't hurt either.  The rosemary on top adds something a little different which I like because after all rosemary is my second favorite herb (with basil being number 1).
And just in case you can't find those frozen rolls this is an easy, good, alternative to the frozen rolls.

Honey Wheat and Rosemary Rolls

Ingredients:
1 packet "highly active" active dry yeast, or 2 1/4 teaspoons active dry yeast, or 2 1/4 teaspoons instant yeast
1 cup lukewarm water
1/4 cup orange juice
1/4 cup (1/2 stick) unsalted butter, cut into 6 pieces
3 tablespoons honey
1-1/2 cup Unbleached All-Purpose Flour
1-1/2 cups Whole Wheat Flour
1 1/4 teaspoons salt
2 tablespoons chopped fresh rosemary
¼ cup unsalted butter, melted
Sea salt

Directions
:Dissolve yeast with lukewarm water. Let the yeast and water sit at room temperature for 15 minutes.  Combine the dissolved yeast with the all of the ingredients except rosemary, sea salt and melted butter. Mix and knead everything together until you've made a smooth dough.  Place the dough in a lightly greased bowl. Cover the bowl, and allow the dough to rise, at room temperature, until doubled in size about 90 minutes to 2 hours.

While the dough is rising, lightly spray a 10” cast iron skillet with olive oil.

Punch dough down and divide into equal balls, approx. 16.  Place the 8 rolls in the 10” cast iron skillet, spacing them evenly so they won't touch one another.  Cover the pans with lightly greased plastic wrap, and allow the rolls to rise for 1 1/2 to 2 hours. They'll become very puffy, and will reach out and touch one another. While the rolls are rising, preheat the oven to 350°F.

Brush with melted butter and sprinkle with rosemary and sea salt.  Bake the rolls for 15 minutes, and tent them loosely with aluminum foil. Continue to bake until they're mahogany-brown on top, but lighter colored on the sides, an additional 10 to 13 minutes.

Sunday, November 22, 2009

Cranberry Sauce


It is almost Thanksgiving again and since the wife will be back in Michigan while I stay here in Maryland this year we thought we would have a small early Thanksgiving meal for this weeks Sunday Dinner Episode.  I decided I would go item by item this year and let you know how we gorged ourselves this year.

If you tuned in expecting to see a traditional style Thanksgiving you will probably be disappointed.  Since it is only me and the wife we don't need to make a large meal or even a whole turkey.  Last year if you remember I made a  smoked turkey breast.  This year will be a little different since I don't have my charcoal grill yet, but for the turkey episode you will have to tune in later because first we need to prepare cranberry sauce before we get to the turkey.

I know a lot of people like to open up a can of cranberries, dump them in a bowl and serve them.  Making cranberries really isn't much more difficult than that and they will taste so much better.  All it takes is a few simple ingredients.......

Looks fairly normal, nothing to exotic unless you count the ginger but even that is readily available in stores these days. 

Now you have just witnessed the hardest part of making cranberry sauce, lining up the cast of characters to take a picture.  I'm serious because now all that's left to be done is dump all the ingredients into a pan and let cook for 15 to 20 minutes.


Oh so good and the ginger gives the cranberries that little extra kick so people will think "There is something a little different going on here but I can't quite put my finger on it."

I'll give this cranberry sauce a 5 out of 5 forks.  I love cranberry and anything cranberry I just wish fresh cranberries were available all year around.

Now stayed tuned for the rest of the 2009 Early Thanksgiving Episode because this is only the beginning for the cranberry sauce.  Tomorrow night we will revisit Big Sis's Rosemary Dinner Rolls but only with my own personal twist.

Jock's Cranberry Sauce
(Printable Recipe)

Ingredients
1 12 oz. Bag fresh cranberries, washed and dried
1-1/2 cups granulated sugar
1/3 cup orange juice
1 cinnamon stick
2 tablespoons grated ginger
1/2 teaspoon ground allspice
1/4 teaspoon ground nutmeg
1 orange, zested and juiced

Directions
In a medium pot, combine the above ingredients. Stir to blend. Bring the mixture to a boil over medium heat. Reduce to a simmer and cook for 15 to 20 minutes until cranberries burst

Thursday, November 19, 2009

Grilled Chicken, Roasted Red Pepper and Spinach Pizza


Over the last few years I have come to realize how lucky or spoiled I was durning my high school years and young adult years.  Back in those days we use to cruise the small town of Clare and by the end of the night it would usually end at the local pizza shop, B & J's and later the Corner Store.  Both had great pizza with the Corner Store pizza having my most favorite crust.  Rumor had it their secret ingredient was sugar, I don't know what it was but it sure was good.  Since my earlier adult years I have had several pizzas for many different places and there is only one place I would rate close to these two eateries. Believe it or not it comes from the little ole town of Plymouth, Wisconsin at a place called De O'Malleys. 

De O'Malleys had good pizza with the crust just the way I like it, traditional style or soft, chewy type.  I'm not a fan of the thin, crispy type of crust and that is what you typically find here in Rockville Maryland.  Oh sure I can find traditional style crust but the pizza is something I wouldn't write home about.  For me I like a little more crust under my pizza toppings and I like the edge of the crust to rise up like bread when it cooks.  I like that golden chunk of cooked pizza dough around the outside a good pizza it reminds me of fresh bread that just came out of the oven.

I know a pizza can't be good without good toppings but the foundation of the pizza begins with the dough.  I have been trying for years to make a good pizza dough without much success until lately.  Recently I came across Emeril's pizza dough from the Food Network web site.  It is a simple recipe with ingredients found in the normal persons kitchen.  I made the dough a few weeks ago and I though it was alright but it was missing something to be that outstanding pizza dough.  I started to do some experimenting and here is what I have come up with so far, a blend of 50% all purpose flour and 50% whole wheat flour.  I'll bet you are wondering how whole wheat flour can be part of a great pizza dough?  I'll be honest the pizza dough is better without the whole flour but I am trying to eat healthier these days and if I want to eat pizza this is my compromise. 

The other change I made from Emeril's dough is I use honey instead of sugar for a sweetener.  I also put a little fresh garlic in the dough this last time I made pizza.  What I came up with was a tasty little crust with a hint of garlic.  I think the honey goes well with the whole wheat theme too and when honey is involved that's never a bad thing.

If you notice in the photo to the right I also cook my pizzas in a cast iron skillet.  Why?  Well, as big sis found out in her Rosemary Dinner Rolls when bread dough is teamed up with heavy cast iron the bread, rolls or in this case the pizza crust comes out golden brown and delicious.  For me the cast iron makes it almost fool proof unless you totally neglect the call of your kitchen timer or the obnoxious screaming of your smoke detector. 

From here on out it's all downhill with the toppings you can choose almost anything you like.  No more are pepperoni, ham, mushrooms or mozzarella cheese must use toppings.  Pizzas come in many, many different varieties these days and lately my choice for toppings have been grilled chicken and roasted red peppers.  I have been experimenting with different cheeses lately with my favorite so far being asiago.  But for this particular pizza I found some fontal cheese at Whole Foods Market this week.  It is similar to mozzarella with a little more distinct flavor than mozzarella.  This pizza also included a handful of spinach (since I didn't have any fresh basil and the spinach was sitting in the ice box begging to be used) and I topped it all off with a little grated parmesan reggiano cheese. 

Overall a pretty good effort on the pizza front for me I think I am making progress.


Jock's Grilled Chicken Pizza
Ingredients
1 cup warm water, about 110 degrees F
1 packet dry yeast
2 tablespoon honey
2 tablespoons olive oil
1 1/2 cups general purpose flour
1 cups whole wheat flour
1/2 teaspoon salt
2 cloves garlic, minced fine
4 boneless skinless chicken thighs
Emeril's Essence
1 small jar roasted red peppers
1 cup pizza sauce
8 oz. asiago cheese. sliced
1 cup fresh spinach
½ cup Parmesan cheese

Directions

To the bowl of an electric mixer fitted with a dough hook, add the warm water and yeast and honey and stir to dissolve the yeast. Add the olive oil, flour, garlic, and salt. Mix with the dough hook until the dough comes together and climbs up the dough hook. Remove the dough from the mixer and, on a floured surface, form into a smooth ball shape. Place the dough into a greased bowl and cover with a clean towel. Place in a warm, draft free place for 45 minutes to 1 hour, or until the dough doubles in size.

Preheat oven to 425 degrees

Meanwhile sprinkle chicken thighs with Emeril's Essence liberally.  Place chicken in oven and cook for approximately 30 minutes.  Or better yet cook outside on grill for 30 minutes.  Let chicken cool and slice.
Heat oven to 450 degrees.

Turn the dough out onto a floured surface and roll to desired size. Spray or brush 12” cast iron skillet with olive oil. Place dough in cast iron skillet and let drape over the edges. Cut dough around top of skillet and fold down along edge to form an edge for the pizza. Spread pizza sauce over dough, layer cheese, add roasted red peppers, chicken and spinach. Top with Parmesan cheese.

Place pizza in oven and cook for approximately 15 minutes or until edges are golden brown. Let cool for 5 minutes and slice.